Haben Sie sich schon einmal gefragt, warum Ihre Sanitäranlagen diese lästigen gurgelnden Geräusche machen? Oder warum Ihre Bewässerungsanlage nicht so funktioniert, wie sie sollte?
Hier ist der Deal: Sie brauchen wahrscheinlich eine Luftventil.
Ich habe im Laufe der Jahre Dutzende von Luftventilen installiert. Und ich habe gelernt, dass es beim ersten Mal richtig gemacht wird und man sich später große Kopfschmerzen erspart.
In diesem Leitfaden werden Sie als Fachmann Luftventilherstellerzeige ich Ihnen genau wie zu installieren Luftventil Systeme für verschiedene Anwendungen. Ganz gleich, ob es sich um Sanitär-, Bewässerungs- oder Wassersysteme handelt, ich habe alles für Sie.
Klingt gut? Tauchen wir ein.
Inhaltsübersicht
- Was ist ein Luftventil (und warum Sie eines brauchen)
- Arten von Luftventilen, denen Sie begegnen werden
- Bevor Sie beginnen: Die wichtigsten Vorbereitungen
- Wie man ein Luftventil installiert: Schritt-für-Schritt-Anleitung
- Häufig zu vermeidende Fehler
- Wartungstipps, die Ihnen Geld sparen
- Erweiterte Installationstipps
- Die Wahl des richtigen Luftventils
- Fehlersuche bei allgemeinen Problemen
- Die Wissenschaft hinter Luftventilen
- Besondere Überlegungen für verschiedene Anwendungen
- Werkzeuge, die Sie tatsächlich benötigen
- Abschließende Überlegungen
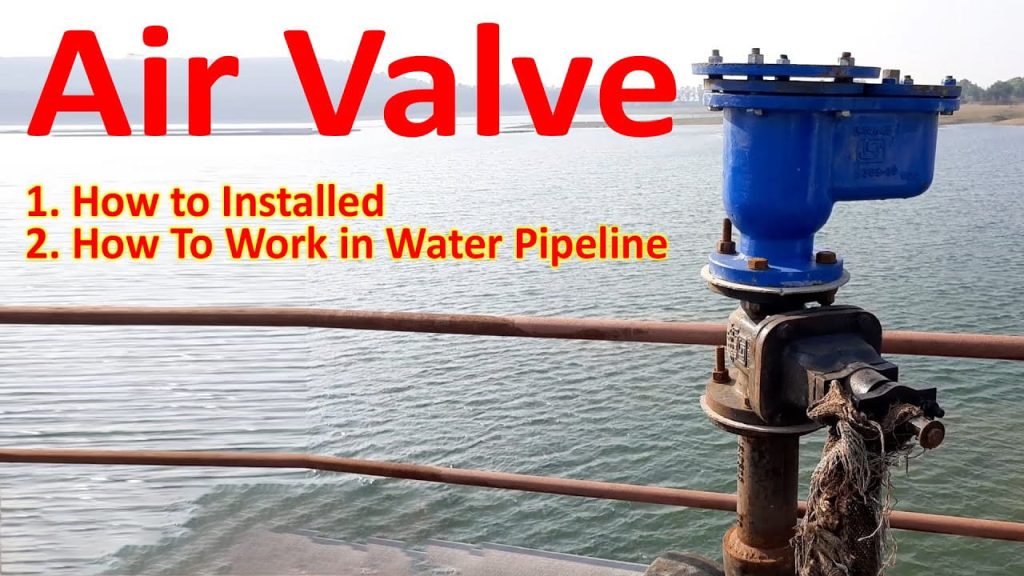
Was ist ein Luftventil (und warum Sie eines brauchen)
Ein Luftventil ist so etwas wie der unbesungene Held Ihres Wassersystems.
Betrachten Sie es einmal so:
Wenn Wasser durch Rohre fließt, entstehen Lufteinschlüsse. Diese Lufteinschlüsse verursachen alle Arten von Problemen:
- Reduzierter Wasserdruck
- Laute Rohre
- Schäden am System
- Ineffizienter Betrieb
Aber hier ist die Sache:
Entlüftungsventile lassen diese eingeschlossene Luft automatisch ab. Außerdem lassen sie bei Bedarf (z. B. beim Entleeren) wieder Luft hinein.
Das Ergebnis? Ihr System läuft reibungslos und leise.
Arten von Luftventilen, denen Sie begegnen werden
Nicht alle Luftventile sind gleich.
Hier sind die wichtigsten Arten, mit denen ich arbeite:
1. Lufteinlassventile (AAV)
Sie sind die erste Wahl für Sanitär- und Abwassersysteme. Sie verhindern, dass Abgase in Ihr Haus eindringen und lassen gleichzeitig Luft in das Abwassersystem.
2. Luftablassventile
Ideal für Bewässerungs- und Wasserverteilungssysteme. Sie lassen während des normalen Betriebs kontinuierlich kleine Lufteinschlüsse ab.
3. Kombinierte Luftventile
Das Schweizer Armeemesser unter den Luftventilen. Sie bewältigen sowohl große Luftmengen beim Befüllen/Entleeren als auch kleine Lufteinschlüsse während des Betriebs.
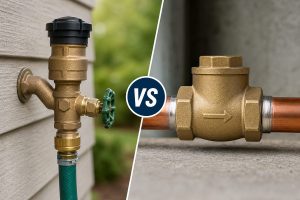
4. Rückschlagventile
Einwegventile, die einen Rückfluss verhindern. Üblich bei Aquarien und speziellen Sanitäranwendungen.
Bevor Sie beginnen: Die wichtigsten Vorbereitungen
Ich erspare Ihnen einige Mühe.
Bevor Sie Rohre anfassen, sollten Sie folgende Punkte überprüfen:
1. Lokale Codes
In einigen Gebieten gelten besondere Anforderungen für Luftventil Installation. (Glauben Sie mir, Sie wollen nicht alles wegen eines Verstoßes gegen die Vorschriften neu machen).
2. Systemkompatibilität
Achten Sie darauf, dass Ihr Ventil zu Ihrem Rohrmaterial passt. PVC-Ventile für PVC-Rohre, Messing für Kupfer, usw.
3. Richtige Dimensionierung
Ein unterdimensioniertes Ventil wird nicht richtig funktionieren. Ein überdimensioniertes Ventil ist überflüssig und teuer.
Profi-Tipp: Ziehen Sie im Zweifelsfall die Auslegungstabelle des Herstellers zu Rate, die auf der Durchflussmenge Ihres Systems basiert.
Wie man ein Luftventil installiert: Schritt-für-Schritt-Anleitung
Installation eines Belüftungsventils (unter der Spüle)
Dies ist die gebräuchlichste Installationsart für Wohngebäude.
Schritt 1: Wählen Sie Ihren Standort
Das Ventil muss installiert werden:
- Oberhalb des Hochwasserspiegels Rand der Armaturen
- Innerhalb von 15 Grad der Vertikalen
- Mindestens 4-6 Zoll über dem horizontalen Abfluss
Schritt 2: Schneiden des Rohres
Stellen Sie die Wasserversorgung ab. Dann:
- Messen und markieren Sie die Stelle, an der das AAV angebracht werden soll
- Schneiden Sie das Rohr mit einem Rohrschneider sauber ab.
- Entgraten und Anfasen der Kanten
Schritt 3: Installieren des Adapters
- PVC-Grundierung auf das Rohr und den Adapter auftragen
- PVC-Zement auftragen
- Schieben Sie den Adapter mit einer Drehbewegung auf das Rohr
- 30 Sekunden lang halten
Schritt 4: Anbringen des Ventils
Das ist der Punkt, an dem die Leute oft scheitern:
- Teflonband im Uhrzeigersinn um das Ventilgewinde wickeln (3-4 Umwicklungen)
- Ziehen Sie das Ventil im Adapter handfest an.
- Benutzen Sie Kanalschlösser für eine zusätzliche Vierteldrehung (nicht zu fest anziehen!)
Schritt 5: Testen Sie Ihre Arbeit
- Stellen Sie das Wasser wieder an
- Wasser durch das Waschbecken laufen lassen
- Auf undichte Stellen prüfen
- Prüfen Sie, ob das Ventil ordnungsgemäß funktioniert.
Installieren eines Entlüftungsventils (Bewässerungssystem)
Bewässerungssysteme erfordern besondere Aufmerksamkeit.
Schritt 1: Finden Sie die Höhepunkte
Luft sammelt sich natürlich an hohen Punkten in Ihrem System. Das ist der Ort, an dem sich Ihre Ventile befinden.
Schritt 2: Installieren Sie zuerst ein Absperrventil
Dies ist für die Wartung von entscheidender Bedeutung:
- Installieren Sie einen Kugelhahn oder Schieber vor dem Luftventil
- Vergewissern Sie sich, dass es sich um einen "vollen Port" handelt (nicht reduziert).
Schritt 3: Erstellen einer vertikalen Steigleitung
Das Ventil MUSS senkrecht stehen:
- Verwenden Sie ein T-Stück an Ihrer Hauptleitung
- Installieren Sie ein vertikales Rohr (gleicher Durchmesser wie die Ventilöffnung)
- Befestigen Sie es an einem Zaunpfosten oder Pfahl, um es senkrecht zu halten.
Schritt 4: Verbinden Sie die Luftventil
Abhängig von Ihrem Rohrmaterial:
- PVC: Schweißen mit Lösungsmittel
- Stahl: Schweißen einer Gewindemuffe
- Polyethylen: Verwenden Sie eine Sattelklemme
Schritt 5: Eine Sammelkammer hinzufügen
Für häufig wechselnde Systeme:
- Verwenden Sie ein größeres T-Stück oder eine erweiterte Kammer
- Dadurch hat die Luft mehr Platz zum Sammeln
- Führt zu einer besseren Leistung der Ventile
Häufig zu vermeidende Fehler
Ich habe diese Fehler schon hunderte Male gesehen:
1. Schräg einbauen
Luftventile funktionieren am besten innerhalb von 5 Grad der Senkrechten. Bei mehr Grad versagt der Schwimmermechanismus.
2. Verwendung von Ventilen mit reduziertem Anschluss
Dies schränkt den Luftstrom ein und verfehlt den Zweck.
3. Vergessen der Zugänglichkeit
Diese Ventile müssen gewartet werden. Vergraben Sie sie nicht und bringen Sie sie nicht an unmöglichen Stellen an.
4. Falscher Ventiltyp
Verwendung einer Standard Luftventil in einem Abwassersystem? Da ist Verstopfung vorprogrammiert. Verwenden Sie stattdessen abwasserspezifische Ventile.
Wartungstipps, die Ihnen Geld sparen
So sorge ich dafür, dass die Luftventile reibungslos funktionieren:
Regelmäßige Inspektion (alle 6 Monate)
- Prüfung auf sichtbare Schäden
- Suchen Sie nach Anzeichen für Undichtigkeiten
- Sicherstellen, dass sich das Ventil noch frei bewegen lässt
Jährliche Reinigung
- Entfernen Sie die Ventilkappe
- Mit mildem Reinigungsmittel reinigen
- O-Ringe prüfen und bei Bedarf ersetzen
- Silikonschmiermittel auf bewegliche Teile auftragen
Testverfahren
- Wasser in das Ventil gießen
- Sie sollte sich schließen, wenn sie voll ist.
- Öffnen eines nachgeschalteten Wasserhahns
- Das Ventil sollte sich öffnen, um Luft einzulassen
Erweiterte Installationstipps
Möchten Sie Ihr Installationsspiel verbessern?
Für Mehrventilsysteme
In komplexen Systemen benötigen Sie möglicherweise mehrere Ventile:
- Legen Sie sie bei langen Läufen alle 800 Meter ab.
- Installation von Nachpumpstationen
- Platzieren Sie sie vor Druckminderungsventilen
- Fügen Sie sie nach den Durchflussmessern hinzu
Für Problembereiche
Haben Sie hartnäckige Luftprobleme? Versuchen Sie dies:
- Einbau von Kombiventilen anstelle von Einzweckventilen
- In aggressivem Wasser Schwimmer aus rostfreiem Stahl verwenden
- Zusätzliche Ablassöffnungen für einfache Wartung
Für maximale Effizienz
Auf die kleinen Details kommt es an:
- Verwenden Sie Rohrdichtmittel UND Teflonband für Metallgewinde.
- Ventile einbauen, bevor das System unter Druck gesetzt wird
- Test bei verschiedenen Durchflussraten
Die Wahl des richtigen Luftventils
Sie sind nicht sicher, welches Ventil Sie kaufen sollen?
Hier ist mein Entscheidungsbaum:
Für Sanitärinstallationen in Wohngebäuden: AAV-Ventile (Marken Oatey oder Studor)
Für die Bewässerung: Kombinierte Luftventile mit großen Öffnungen
Für Abwasser: Abwasser-Luftventile mit Anti-Verstopfungsfunktion
Für Hochdrucksysteme: Federbelastete Entlüftungsventile
Die Preisspanne reicht von $15 für einfache AAVs bis $500+ für große Kombiventile.
Fehlersuche bei allgemeinen Problemen
Selbst bei einer perfekten Installation können Probleme auftreten.
Das Ventil lässt sich nicht schließen
Ursache: Trümmer in der Dichtung
Fix: Ausbau und Reinigung des Ventils
Konstante Luftabgabe
Ursache: System zieht Luft an anderer Stelle ab
Fix: Prüfen Sie, ob die Saugseite undicht ist.
Aus dem Ventil spritzendes Wasser
Ursache: Ventil zu tief eingebaut
Fix: Das Ventil im System höher ansetzen
Die Wissenschaft hinter Luftventilen
Das Verstehen des Warum hilft bei der Frage nach dem Wie.
Luft tritt durch die Rohre ein:
- Pumpen, die gelöste Luft aus dem Wasser ziehen
- Undichte Verbindungen unter Vakuum
- Chemische Reaktionen (insbesondere in Abwässern)
- Leere Rohre während des Starts
Ohne richtige Entlüftung bekommen Sie:
- 30% Verringerung des Wirkungsgrads der Pumpe
- Beschleunigte Rohrkorrosion
- Wasserschlagschäden
- Ungenaue Durchflussmesser
Deshalb ist der richtige Einbau so wichtig.
Besondere Überlegungen für verschiedene Anwendungen
Installation in Wohngebäuden
- Fokus auf Lärmreduzierung
- Ästhetik ist wichtiger
- Zugänglichkeit für Hauseigentümer
Landwirtschaftliche Systeme
- Langlebigkeit vor Aussehen
- Große Öffnungen für hohen Durchfluss
- Schutz vor Viehbestand
Kommunale Wassersysteme
- AWWA Einhaltung von Normen
- SCADA-Kompatibilität
- Redundanzplanung
Werkzeuge, die Sie tatsächlich benötigen
Überspringen Sie den Schnickschnack. Hier ist, was wirklich wichtig ist:
Unverzichtbare Tools:
- Rohrabschneider oder Bügelsäge
- Teflonband
- Kanalschlösser
- Level (ernsthaft, lassen Sie das nicht aus)
- Gewindedichtmittel
Schön zu haben:
- Rohrentgratungswerkzeug
- Drehmomentschlüssel
- Digitaler Druckmesser
Abschließende Überlegungen
Der Einbau von Luftventilen ist keine Raketenwissenschaft. Aber wenn man es richtig macht, muss man auf die Details achten.
Die wichtigsten Erkenntnisse:
- Wählen Sie den richtigen Ventiltyp für Ihre Anwendung
- Vertikaler Einbau (immer!)
- Die richtige Größe für Ihr System
- Für die Wartung zugänglich machen
- Testen Sie gründlich, bevor Sie es als fertig bezeichnen
Zur Erinnerung: Eine ordnungsgemäß installierte Luftventil ist unsichtbar. Sie werden vergessen, dass sie überhaupt da ist, weil Ihr System einfach funktioniert.
Aber Schritte auslassen oder an der falschen Stelle sparen? Sie werden jedes Mal daran erinnert, wenn Sie ein gurgelndes Geräusch hören oder mit vermindertem Druck zu kämpfen haben.
Die Quintessenz?
Nehmen Sie sich Zeit für die Installation. Wenn Sie es einmal richtig machen, werden Sie jahrelang einen störungsfreien Betrieb genießen können.
Das ist wie zu installieren Luftventil Systeme auf die richtige Art und Weise.
Ihre Rohre (und Ihr Verstand) werden es Ihnen danken.