Как измерить размер дроссельного клапана на первый взгляд может показаться простым. Но вот в чем дело: неправильное решение может стоить вам тысяч задержек в установке, сбоев в работе системы и аварийного ремонта.
Я видел, как бесчисленное множество инженеров и техников пытаются решить эту, казалось бы, простую задачу. В чем проблема? Большинство людей сосредотачиваются только на диаметре и полностью игнорируют другие критические размеры, которые определяют, будет ли поворотный клапан будет действительно подходить и правильно функционировать в их системе.
В этом руководстве я расскажу вам о точном процессе, который я использую для точного измерения поворотных заслонок каждый раз. К концу вы будете точно знать, какие размеры имеют значение, какие инструменты вам нужны и как избежать дорогостоящих ошибок, которые ставят в тупик даже опытных профессионалов.
Звучит неплохо? Давайте погрузимся.

Оглавление
- Почему важны точные измерения поворотных затворов
- Основные инструменты для измерения поворотных затворов
- Как измерить размер дроссельного клапана: Шаг за шагом
- Ключевые аспекты, которые большинство людей упускают из виду
- Распространенные ошибки в измерениях (и как их избежать)
- Отраслевые стандарты, которые необходимо знать
- Практические советы для различных областей применения
- Когда следует обратиться к профессионалам
- Передовые методы измерения для 2025 года
- Заключение
Почему важны точные измерения поворотных затворов
Прежде чем мы перейдем к деталям, позвольте мне рассказать одну историю, которая иллюстрирует, почему это важно.
В прошлом году одно крупное водоочистное предприятие заказало сменные поворотные затворы, ориентируясь на то, что они, по их мнению, имеют правильный размер. Клапаны были доставлены, но знаете что? Они не подошли. Размеры между торцами не совпадали всего на 2 дюйма.
Результат? Трехнедельная остановка, которая стоила им более $200 000 потерянной производительности.
Итог: Точное измерение не просто важно - оно абсолютно необходимо.
Основные инструменты для измерения поворотных затворов
Вот что вам понадобится для проведения измерений на профессиональном уровне:
Основные инструменты:
- Штангенциркуль (лучше цифровой для точности)
- Стальная линейка или рулетка
- Прецизионный штангенциркуль для измерения посадочного места
- Фланцевый манометр (необязательно, но полезно)
Совет профессионала: Инвестируйте в качественные измерительные инструменты. Цифровой штангенциркуль $50 окупится с первого раза, когда он предотвратит ошибку в размерах.
Как измерить размер дроссельного клапана: Шаг за шагом
Теперь настало время для главного события. Вот мой проверенный 7-шаговый процесс точного измерения дроссельных заслонок:
Шаг 1: Определите тип клапана
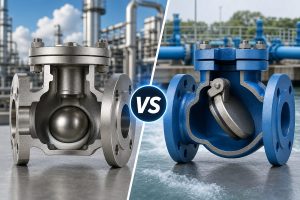
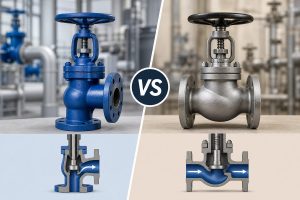
Прежде всего, определите, с чем вы имеете дело: с пластинчатым, ушковым или фланцевым поворотным затвором. Это влияет на то, какие измерения вам нужно будет провести.
Вафельные клапаны располагаются между двумя фланцами
Клапаны проушин имеют резьбовые отверстия для болтов
Фланцевые клапаны имеют собственные фланцы
Шаг 2: Измерьте номинальный диаметр (DN/NPS)
Это самое важное измерение - измерение, которое, как все думают, они умеют делать.
Вот как сделать это правильно:
- Для доступных клапанов: Откройте диск до полного положения и измерьте внутренний диаметр в самом узком месте
- Для установленных клапанов: Измерьте диаметр отверстия фланца (он должен соответствовать номинальному размеру).
- Многократное прочтение по окружности для учета износа
Распространенные размеры варьируются от:
- Малое применение: 2-6 дюймов (DN50-DN150)
- Промышленные системы: 8-24 дюйма (DN200-DN600)
- Крупная инфраструктура: 30+ дюймов (DN750+)
Шаг 3: Определите размеры лица
Это измерение ставит в тупик больше людей, чем любое другое. Вот почему это очень важно: размер между лицевыми сторонами должен точно соответствовать расстоянию между трубопроводами.
Для пластинчатых клапанов: Измерьте толщину корпуса от входной до выходной уплотнительной поверхности
Для фланцевых клапанов: Измерьте от уплотнительной поверхности одного фланца до уплотнительной поверхности противоположного фланца
Отраслевые стандарты, которые необходимо знать:
- API 609: Охватывает поворотные затворы общего назначения
- ASME B16.10: Определяет стандартные размеры лицом к лицу
- ISO 5752: Международный стандарт для размеров клапанов
Шаг 4: Измерьте характеристики фланца
Если вы имеете дело с фланцевыми клапанами, вам необходимы эти четыре критических измерения:
Наружный диаметр фланца (OD)
Измерьте по самой широкой части фланца
Диаметр окружности болта (BCD)
Измерьте от центра одного отверстия под болт до центра прямо противоположного отверстия
Количество и размер отверстий для болтов
Сосчитайте отверстия и измерьте их диаметр штангенциркулем
Толщина фланца
Измерьте от задней поверхности до уплотнительной поверхности
Шаг 5: Проверьте номинальное давление
Не пропускайте этот шаг. Номинальное давление напрямую влияет на конструкцию и размеры клапана:
- Класс 150: Рабочее давление до 285 PSI
- Класс 300: Рабочее давление до 740 PSI
- Класс 600: Рабочее давление до 1480 PSI
Более высокие показатели давления означают более толстые фланцы и большие размеры болтов.
Шаг 6: Измерьте размеры седла клапана
Для обслуживания и замены вам понадобятся эти размеры сиденья:
- Внутренний диаметр (ID)
- Наружный диаметр (OD)
- Толщина сиденья
- Высота сиденья
Для этих измерений используйте точный штангенциркуль - точность здесь очень важна.
Шаг 7: Документируйте все
Большинство людей забывают об этом: немедленно задокументируйте свои измерения.
Создайте простую диаграмму, например, такую:
| Размер | Измерение | Примечания |
|---|---|---|
| Номинальный диаметр | 8 дюймов | DN200 |
| Лицом к лицу | 2,5 дюйма | ASME B16.10 |
| Наружный диаметр фланца | 11,75 дюйма | Класс 150 |
| Окружность болта | 9,5 дюймов | 8 отверстий |
Ключевые аспекты, которые большинство людей упускают из виду
Измерив сотни поворотных затворов, я заметил, что люди постоянно упускают эти критические размеры:
Общая высота
Измерьте от нижней части корпуса клапана до самой высокой точки (привод или маховик). Это определяет требования к зазору.
Диаметр штока
Критически важно для совместимости приводов и доступа к обслуживанию.
Схема монтажа привода
Если ваш клапан оснащен приводом, измерьте схему расположения болтов и их размеры.
Совет профессионала: Сфотографируйте клапан с разных сторон. Они окажут неоценимую помощь при выборе замены спустя месяцы или годы.
Распространенные ошибки в измерениях (и как их избежать)
Позвольте мне поделиться 5 самыми распространенными ошибками, которые я постоянно вижу:
Ошибка #1: Измерение в неправильном месте
Проблема: Измерение наружного диаметра корпуса клапана вместо внутреннего диаметра потока
Решение: Для определения размера всегда измеряйте внутренний диаметр отверстия
Ошибка #2: игнорирование типов фланцевых поверхностей
Проблема: Не различают фланцы с плоской, рельефной и RTJ поверхностью
Решение: Перед измерением определите тип торца фланца и укажите его в документации
Ошибка #3: Забудьте о прокладках
Проблема: Не учитывается толщина прокладки при измерениях лицом к лицу
Решение: Всегда обращайте внимание на тип и толщину прокладки.
Ошибка #4: Смешанные единицы
Проблема: Смешивание метрических и имперских измерений
Решение: Выберите одну систему и придерживайтесь ее на протяжении всего процесса
Ошибка #5: пропуск перекрестных ссылок
Проблема: Отсутствие проверки измерений на соответствие спецификациям производителя
Решение: По возможности всегда перепроверяйте свои измерения с опубликованными стандартами
Отраслевые стандарты, которые необходимо знать
В разных отраслях и регионах используются разные стандарты. Вот что вам нужно знать:
Североамериканские стандарты
- ASME/ANSI B16.5: Размеры фланца
- API 609: Технические характеристики поворотных затворов
- MSS SP-67: Поворотные затворы NPS 1½ - 72
Международные стандарты
- ISO 5752: Очные измерения
- DIN EN 558: Европейские стандарты клапанов
- JIS: Японские промышленные стандарты
Итог? Прежде чем приступить к измерениям, узнайте, какой стандарт применим к вашей области применения.
Практические советы для различных областей применения
Системы отопления, вентиляции и кондиционирования воздуха (2-12 дюймовых клапана)
- Ориентируйтесь на размеры по торцам для совместимости с воздуховодами
- Наиболее распространены фланцы класса 150
- Обратите внимание на требования к зазорам в приводе
Очистка воды (клапаны 8-48 дюймов)
- Уделите особое внимание идентификации коррозионностойких материалов
- Проверьте наличие специальных покрытий, которые могут повлиять на размеры
- Документируйте любые пользовательские модификации
Промышленные процессы (4-36 дюймовые клапаны)
- Проверка номинального давления имеет решающее значение
- Химическая совместимость влияет на выбор материала
- Температурные показатели влияют на характеристики прокладок и седел
Когда следует обратиться к профессионалам
Иногда для измерения поворотных затворов требуются специальные знания. Вызовите профессионала, если:
- Работа с экзотическими материалами или специальными приложениями
- Работа с системами высокого давления (класс 600+)
- Измерение критических систем безопасности
- Работа с нестандартными или модифицированными клапанами
Стоимость профессиональной консультации всегда меньше, чем стоимость неправильного решения.
Передовые методы измерения для 2025 года
Технологии значительно улучшили измерение клапанов. Вот некоторые передовые подходы:
3D-сканирование
При изготовлении сложных клапанов 3D-сканирование позволяет создавать точные цифровые модели с автоматической фиксацией всех размеров.
Системы цифровой документации
QR-коды и цифровые метки делают идентификацию клапанов и отслеживание измерений гораздо более надежными.
Инструменты дополненной реальности
AR-приложения могут накладывать измерительные справочники и данные спецификаций непосредственно на клапан во время проверки.
Заключение
Обучение как измерить размер дискового затвора Правильно - это один из тех навыков, которые отличают профессионалов от любителей.
Если все сделать правильно, ваши системы будут работать бесперебойно долгие годы. Если сделать это неправильно, вы столкнетесь с дорогостоящими отключениями, аварийным ремонтом и множеством объяснений.
Основные выводы? Используйте правильные инструменты, следуйте систематическому процессу, документируйте все и всегда сверяйте свои измерения с отраслевыми стандартами.
Помните: измерение поворотных затворов - это не только диаметр. Размеры торцевых поверхностей, характеристики фланцев, номинальное давление и размеры седла - все это играет важную роль в обеспечении правильной посадки и функционирования.
Освойте этот процесс, и вам больше никогда не придется беспокоиться о том, что вы заказали не тот клапан. Очень круто, правда?