Установка обратного клапана в системе насоса - это не просто "приятная мелочь".
Это абсолютно необходимо.
Без него? Ваш насос будет работать сверхурочно, постоянно включаясь и выключаясь. А это означает увеличение счетов за электроэнергию, преждевременный выход насоса из строя и возможное затопление подвала.
Хорошие новости?
Установка обратный клапан Это простой проект "сделай сам", с которым большинство домовладельцев могут справиться за день.
В этом руководстве я расскажу вам о том. как установить обратный клапан в шахтном насосе шаг за шагом. Вы узнаете, какие инструменты вам понадобятся, как расположить клапан и как избежать наиболее распространенных ошибок при установке.
Давайте окунемся с головой.
Оглавление
- Почему вашему насосу отчаянно нужен обратный клапан
- Что вам понадобится: Инструменты и материалы
- Выбор правильного обратного клапана для вашей системы
- Как установить обратный клапан в шахтном насосе: Пошаговый процесс
- Шаг 1: Безопасность превыше всего - отключите питание
- Шаг 2: Слейте воду из системы
- Шаг 3: Найдите идеальное место для установки
- Шаг 4: Отметьте точки отсечения
- Шаг 5: Сделайте разрез
- Шаг 6: Сухая подгонка
- Шаг 7: Нанесите грунтовку и цемент для ПВХ
- Шаг 8: Установите критическое отверстие
- Шаг 9: Обеспечьте надлежащее время отверждения
- Шаг 10: Тестирование системы
- Распространенные ошибки при установке (и как их избежать)
- Когда следует обращаться к профессионалам
- Обслуживание и устранение неисправностей
- Итоги
Почему вашему насосу отчаянно нужен обратный клапан
Дело вот в чем:
Без обратного клапана сила тяжести работает против вашей системы выгребного насоса.
Когда насос отключается, вся вода из напорной трубы стекает обратно в выгребную яму. Это заставляет насос снова и снова перекачивать одну и ту же воду.
И это создает три большие проблемы:
Проблема #1: короткий цикл
Ваш насос постоянно включается и выключается. Это создает огромную нагрузку на двигатель и электрические компоненты, что приводит к преждевременному выходу из строя.
Проблема #2: Энергетические отходы
Вы буквально платите за то, чтобы перекачивать одну и ту же воду несколько раз. Это выливается в сотни долларов впустую потраченного электричества каждый год.
Проблема #3: Повреждение насоса
Постоянная цикличность может привести к образованию воздушных пробок в системе, что заставит насос работать всухую и может привести к перегоранию двигателя.
В итоге? Обратный клапан предотвращает обратный поток воды и защищает ваши инвестиции.
Что вам понадобится: Инструменты и материалы
Прежде чем приступить к работе, давайте соберем все необходимое для этого проекта.
Основные инструменты:
- Резак для ПВХ-труб или ножовка
- Дрель со сверлом 3/16″
- Регулируемые плоскогубцы
- Трубный ключ
- Измерительная лента
- Маркер или карандаш
- Наждачная бумага
- Защитные перчатки и очки
Необходимые материалы:
- Обратный клапан (размер должен соответствовать диаметру сливной трубы)
- Грунтовка и цемент для ПВХ
- Резиновые муфты или муфты из ПВХ
- Зажимы для шлангов
- Труба ПВХ 40-го калибра (при необходимости)
- Тефлоновая лента
- Ведро для тестирования
Совет профессионала: Большинство бытовых выгребных насосов используют напорные трубы диаметром 1,25 или 1,5 дюйма. Измерьте диаметр трубы, прежде чем отправляться в хозяйственный магазин.
Выбор правильного обратного клапана для вашей системы
Не все обратные клапаны созданы одинаковыми.
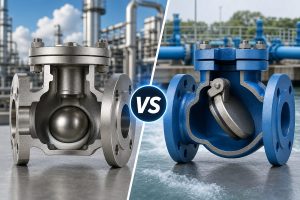
В местном хозяйственном магазине вы найдете три основных типа:
Поворотные обратные клапаны: Базовый и доступный, но может быть шумно, когда они закрываются.
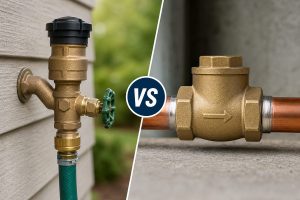
Пружинные клапаны: Более надежное закрытие, но немного дороже.
Бесшумные обратные клапаны: Предназначен для снижения шума от гидроударов. Идеально подходит для тех случаев, когда откачивающий насос находится рядом с жилыми помещениями.
Большинству домовладельцев я рекомендую выбрать бесшумный обратный клапан. Да, они стоят немного дороже. Но снижение шума стоит каждого пенни.
Как установить обратный клапан в шахтном насосе: Пошаговый процесс
Теперь о главном. Вот как именно нужно устанавливать обратный клапан в системе подкачивающего насоса:
Шаг 1: Безопасность превыше всего - отключите питание
Прежде чем что-либо трогать, отключите подкачивающий насос от источника питания.
Выньте вилку из розетки или выключите рубильник. Вода и электричество не смешиваются, и мы не будем рисковать.
Шаг 2: Слейте воду из системы
По возможности откачайте из выгребной ямы как можно больше воды. Это сделает установку чище и проще.
Используйте ведро или пылесос для удаления стоячей воды. Не обязательно убирать все до капли, но меньше воды - меньше беспорядка.
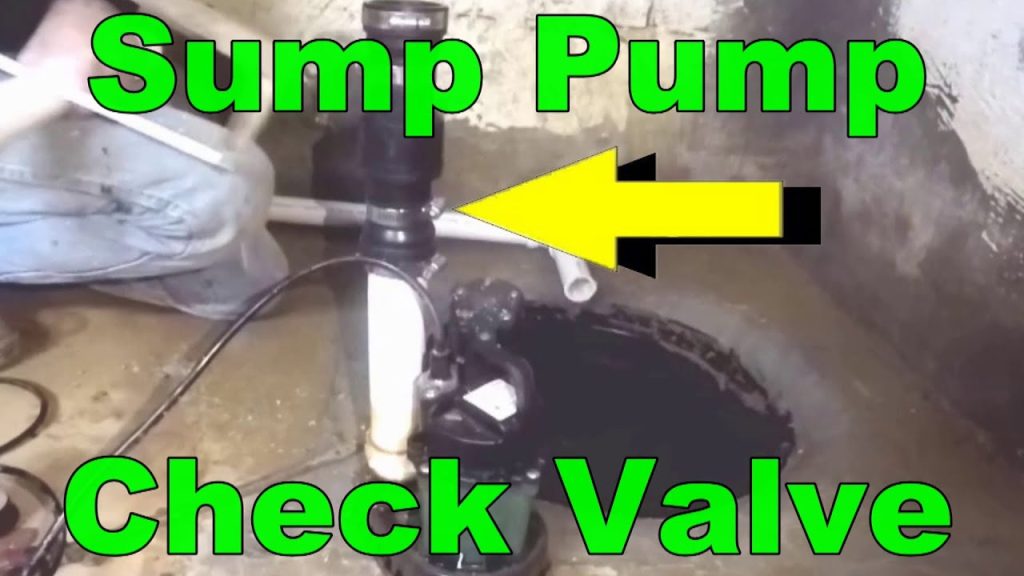
Шаг 3: Найдите идеальное место для установки
Именно здесь большинство "самодельщиков" допускают ошибку:
Они устанавливают обратный клапан слишком высоко или слишком низко.
Оптимальное место? В диапазоне 8-18 дюймов над выходным отверстием насоса.
Такое позиционирование дает несколько ключевых преимуществ:
- Легкий доступ для дальнейшего обслуживания
- Минимизирует объем обратного потока
- Предотвращает проблемы с воздушной пробкой
- Снижает уровень шума в системе
Важно: Убедитесь, что к клапану по-прежнему можно подобраться для осмотра и очистки. Не закапывайте его там, где вы его больше никогда не увидите.
Шаг 4: Отметьте точки отсечения
С помощью рулетки отметьте, где именно вы будете отрезать выпускную трубу.
Помните: Обратный клапан должен помещаться между этими вырезами с надлежащими соединениями с обеих сторон.
Нанесите четкую разметку перманентным маркером. Измерьте дважды, отрежьте один раз.
Шаг 5: Сделайте разрез
Используя резак для ПВХ-труб (или ножовку), сделайте чистые прямые надрезы в отмеченных местах.
Если вы используете ножовку, отшлифуйте края среза, чтобы удалить все заусенцы. Неровные края могут помешать правильному уплотнению и впоследствии привести к протечкам.
Шаг 6: Сухая подгонка
Перед нанесением клея выполните полную сухую подгонку.
Установите обратный клапан между обрезанными концами труб и убедитесь в этом:
- Стрелка потока направлена в сторону от насоса
- Все соединения плотно прилегают друг к другу
- У вас достаточно свободного пространства для работы
- Клапан правильно ориентирован (обычно вертикально)
Критическая проверка: Стрелка потока - это все. Установите ее в обратном направлении, и ваш насос вообще не будет нагнетать воду.
Шаг 7: Нанесите грунтовку и цемент для ПВХ
Работая быстро (ПВХ-цемент быстро застывает), нанесите грунтовку как на внешнюю поверхность трубы, так и на внутреннюю часть фитинга.
Сразу же нанесите ПВХ-цемент, равномерно покрывая обе поверхности.
Вставьте обратный клапан и слегка поверните его, чтобы обеспечить равномерное распределение. Крепко держите в течение 30 секунд, пока цемент не начнет застывать.
Совет профессионала: Если вы соединяете несколько частей, работайте по частям. Не пытайтесь закрепить все сразу.
Шаг 8: Установите критическое отверстие
Этот шаг предотвращает катастрофическое повреждение насоса.
Просверлите отверстие диаметром 3/16″ примерно в 2-3 дюймах над обратным клапаном, под углом 45 градусов вниз.
Это отверстие предотвращает образование воздушной пробки, которая может привести к пересыханию насоса и его перегоранию.
Примечание: Некоторые новые обратные клапаны поставляются с предварительно просверленными отверстиями для отвода влаги. Прежде чем сверлить дополнительные отверстия, ознакомьтесь с инструкциями производителя.
Шаг 9: Обеспечьте надлежащее время отверждения
Дайте ПВХ-цементу затвердеть в течение рекомендованного производителем времени (обычно не менее 15-30 минут).
Не торопитесь с этим шагом. Правильное отверждение обеспечивает водонепроницаемость, которая сохранится на долгие годы.
Шаг 10: Тестирование системы
Настало время момента истины.
Подключите питание к выгребному насосу и медленно вылейте в яму 3-5 галлонов воды.
Следите за:
- Правильное включение насоса
- Вода, проходящая через обратный клапан
- Отсутствие обратного потока при остановке насоса
- Отсутствие утечек на всех соединениях
- Правильное отключение насоса
Распространенные ошибки при установке (и как их избежать)
Помогая сотням домовладельцев с системами откачки воды, я вижу эти ошибки снова и снова:
Ошибка #1: установка клапана слишком высоко
Некоторые самодельщики считают, что "выше - лучше", и устанавливают обратный клапан на 3 с лишним фута выше насоса.
Плохая идея.
Это позволяет большому количеству воды стекать обратно, что полностью сводит на нет назначение клапана.
Ошибка #2: неправильное направление потока
Установка клапана в обратном направлении - удивительно распространенное явление. Всегда перепроверяйте стрелку потока перед нанесением цемента.
Ошибка #3: пропуск отверстия для плача
При отсутствии отверстия воздух может попасть в систему. Это заставляет насос работать против давления воздуха и может привести к перегреву.
Ошибка #4: Плохая поддержка труб
Если не обеспечить надлежащую поддержку нагнетательного трубопровода, это приведет к нагрузке на все соединения. Используйте трубные хомуты и подвески для надлежащего закрепления вертикальных и горизонтальных трубопроводов.
Ошибка #5: использование клапана неправильного размера
Слишком маленький клапан ограничивает поток и снижает эффективность насоса. Слишком большой клапан может привести к нарушению герметичности.
Когда следует обращаться к профессионалам
Хотя установка обратного клапана - это, безусловно, проект, который можно сделать своими руками, в некоторых ситуациях требуется помощь профессионалов:
- Сложные многонасосные системы
- Необычные конфигурации труб или труднодоступные места
- Необходимы электрические модификации
- Системы с эжекторными насосами или перекачкой сточных вод
- В любой момент, когда вы не уверены в 100% установке
Помните: Правильно установленный обратный клапан защищает значительные инвестиции. В случае сомнений вызывайте лицензированного сантехника.
Обслуживание и устранение неисправностей
Установленный вами обратный клапан - это не просто компонент "установи и забудь".
Ежегодный график проверок:
- Проверьте, не скапливается ли мусор вокруг клапана
- Прослушивайте необычные шумы во время циклов работы насоса
- Проверьте правильность закрытия клапана после остановки насоса
- Проверьте все соединения на наличие утечек
Общие проблемы и решения:
Шумная работа: Обычно вызывается гидроударом. Рассмотрите возможность установки бесшумного обратного клапана или изменения ориентации клапана.
Клапан не закрывается: Часто из-за мусора, препятствующего надлежащему уплотнению. Очистите внутреннюю часть клапана и проверьте, не изношены ли уплотнения.
Постоянный обратный поток: Может указывать на поврежденное седло клапана или неправильную установку. Проверьте и при необходимости замените.
Итоги
Установка обратного клапана - это одно из лучших вложений в систему насоса.
За менее чем $50 материалов и несколько часов работы вы получите:
- Значительно продлевает срок службы вашего насоса
- Сократите расходы на электроэнергию
- Предотвращение затопления подвалов
- Устранение раздражающей цикличности работы насоса
И теперь вы точно знаете. как установить обратный клапан в шахтном насосе правильный путь.
Главное - не торопиться, следовать надлежащим процедурам и не срезать углы при установке. Ваш подвал (и ваш кошелек) будет благодарить вас долгие годы.
Готовы приступить к работе? Возьмите свои инструменты и давайте защитим эти инвестиции в откачивающий насос должным образом.