¿Alguna vez ha abierto el grifo del agua caliente y le ha salido... agua fría? ¿O ha notado que salía agua caliente misteriosamente de su grifo de agua fría?
Sí, probablemente sea la válvula de retención del calentador de agua.
Este es el trato:
Encontrar y comprender la válvula de retención de su calentador de agua no es sólo solucionar problemas. Se trata de prevenir reparaciones costosas en el futuro.
En esta guía, como profesional válvula antirretorno fabricante, le mostraré exactamente dónde encontrar su válvula de retención, cómo saber si funciona correctamente y qué hacer cuando no lo hace.
Vamos a sumergirnos.
Índice
- ¿Qué es una válvula antirretorno de calentador de agua (y por qué debería importarle)?
- Dónde encontrar la válvula de retención del calentador de agua
- Tipos de válvulas antirretorno que puede encontrar
- Señales de que su válvula de retención necesita atención
- Cómo comprobar la válvula de retención
- Problemas comunes de las válvulas antirretorno (y soluciones)
- Bricolaje frente a instalación profesional
- Consejos de mantenimiento para prolongar la vida útil de las válvulas antirretorno
- Consideraciones especiales para diferentes sistemas
- Cuándo actualizar su válvula antirretorno
- Lo esencial
¿Qué es una válvula antirretorno de calentador de agua (y por qué debería importarle)?
Lo primero es lo primero:
Una válvula antirretorno es una válvula unidireccional que impide que el agua fluya hacia atrás a través de su sistema de fontanería.
Piense en ello como si fuera una señal de dirección única para el agua. El agua puede fluir en una dirección, pero no en la otra.
Para los calentadores de agua, esto significa:
- El agua caliente se queda donde debe estar
- El agua fría no refluye al depósito
- Su sistema mantiene la presión adecuada
Sin una válvula de retención que funcione correctamente, te enfrentas a:
- Sale agua caliente de los grifos fríos (muy molesto)
- Ciclos de calefacción ineficaces
- Posibles daños en el calentador de agua
- Facturas energéticas más elevadas
¿En resumidas cuentas? Esta pequeña válvula hace MUCHO trabajo.
Dónde encontrar la válvula de retención del calentador de agua
Ahora el evento principal.
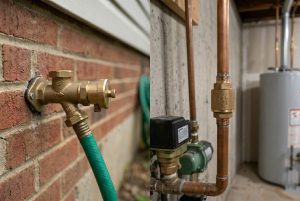
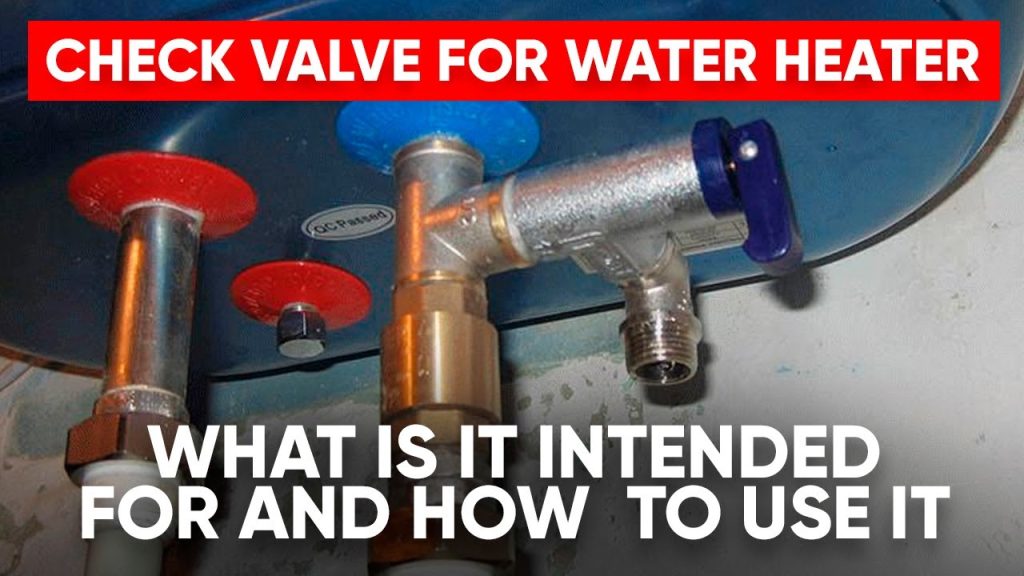
La válvula de retención de su calentador de agua suele estar situada en el tubo de entrada de agua fría en la parte trasera del calentador de agua.
Pero aquí es donde se pone interesante:
No todos los calentadores de agua tienen la válvula de retención en el mismo lugar.
Ubicación estándar: Entrada de agua fría
En la mayoría de los casos, encontrará la válvula de retención aquí:
- Mire en la parte superior de su calentador de agua - Verás dos tubos
- Encontrar la tubería de entrada de agua fría - Suele ser el tubo de la derecha cuando se mira hacia el calefactor.
- Sigue la tubería de vuelta - La válvula de retención se instalará en línea, a menudo a menos de 30 cm del punto en el que la tubería se conecta al depósito.
La válvula en sí parece un pequeño cilindro o accesorio en la tubería. La mayoría tiene una flecha que indica la dirección del flujo de agua.
Ubicación alternativa: Salida de agua caliente
Algunos calentadores de agua (especialmente los modelos más nuevos o RVs) tienen la válvula de retención en la salida de agua caliente en su lugar.
¿A qué se debe esta diferencia?
Depende de su instalación de fontanería específica y de los códigos locales. Ambas ubicaciones evitan el reflujo, sólo que lo hacen desde puntos diferentes del sistema.
Cómo identificar su válvula antirretorno
Esto es lo que hay que tener en cuenta:
- Componente cilíndrico pequeño instalado en línea con la tubería
- Flecha de dirección del caudal apuntando hacia el depósito (para la entrada) o hacia fuera (para la salida)
- Construcción de latón o plástico (latón es más común y duradero)
- Talla: Por lo general, accesorio de 1/2″ a 3/4″.
Consejo profesional: Si tiene problemas para localizarla, utilice una linterna y un espejo para ver detrás del depósito. La válvula de retención puede estar escondida en un lugar estrecho.
Tipos de válvulas antirretorno que puede encontrar
No todas las válvulas antirretorno son iguales.
He aquí los principales tipos que encontrará:
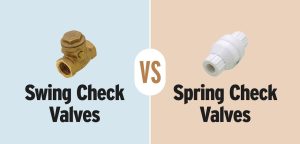
Válvulas antirretorno accionadas por muelle
- Tipo más común
- Utiliza un mecanismo de resorte para controlar el caudal
- Más fiables que los de clapeta
- Hace un ligero chasquido al funcionar
Válvulas antirretorno de bola
- Utiliza un rodamiento de bolas para bloquear el flujo inverso
- Muy resistente
- Común en instalaciones de alta calidad
- Ligeramente más caro
Válvulas antirretorno de clapeta
- Opción presupuestaria
- Utiliza una solapa abatible
- Más propensos al fracaso
- Suelen encontrarse en instalaciones antiguas
El tipo importa porque afecta:
- Duración de la válvula
- Cómo evita el reflujo
- Si oirá ruido durante el funcionamiento
Señales de que su válvula de retención necesita atención
Aquí es donde las cosas se ponen prácticas.
Estos síntomas significan que su válvula de retención podría estar fallando:
1. Agua caliente en líneas frías
Esta es la clásica señal. ¿Abres un grifo frío y te sale agua caliente? Su válvula de retención no está haciendo su trabajo.
2. Baja presión de agua caliente
Si la presión del agua fría es buena pero apenas sale agua caliente, es posible que la válvula de retención esté atascada.
3. El calentador de agua funciona constantemente
Una válvula de retención defectuosa puede provocar que el agua caliente vuelva a salir por la tubería fría, haciendo que el calentador trabaje más de la cuenta.
4. Ruidos extraños
¿Oye quejidos, martilleos o chasquidos? Podría ser su válvula de retención luchando.
Lo aprendí por las malas cuando mi propio calentador de agua empezó a hacer lo que yo llamo ruidos de "vaca enfadada". Resultó que la válvula de retención estaba corroída y parcialmente atascada.
Cómo comprobar la válvula de retención
¿Quiere saber si su válvula de retención funciona realmente?
He aquí una prueba sencilla:
- Cierre el suministro de agua fría a su calentador de agua
- Abrir un grifo de agua caliente en algún lugar de tu casa
- Espere 30 segundos - El agua debe dejar de fluir
- Comprobar los grifos de agua fría - Si sigue saliendo agua, es posible que la válvula de retención esté fallando.
Otro método:
Palpe las tuberías. Si la tubería de entrada de agua fría está caliente a varios metros del calentador, tiene problemas de reflujo.
Problemas comunes de las válvulas antirretorno (y soluciones)
Hablemos de lo que falla y de cómo solucionarlo.
Problema 1: Atascado cerrado
Síntomas: No sale agua caliente, buena presión de agua fría
Causa: Suciedad, acumulación de cal o corrosión
Fijar: Desmontar y limpiar, o sustituir la válvula
Problema 2: atascado abierto
Síntomas: Agua caliente en líneas frías, ciclos constantes del calentador
Causa: Muelle desgastado, junta dañada
Fijar: Sustituya la válvula (la limpieza no servirá de nada en este caso).
Problema 3: Bloqueo parcial
Síntomas: Presión de agua caliente reducida, temperatura incoherente
Causa: Yacimientos minerales
Fijar: Retirar y descalcificar, o sustituir
Problema 4: Funcionamiento ruidoso
Síntomas: Sonidos de chasquidos, martilleos o quejidos
Causa: Montaje flojo, piezas desgastadas o alta presión de agua
Fijar: Comprobar el montaje, considerar un reductor de presión
Bricolaje frente a instalación profesional
Esta es mi opinión:
Sustituir una válvula antirretorno no es ciencia espacial. Pero tampoco es exactamente un proyecto para principiantes.
Cuándo hacer bricolaje:
- Te sientes cómodo con la fontanería básica
- La válvula es fácilmente accesible
- Tienes las herramientas adecuadas
- Puedes cortar el agua y vaciar el calentador
Cuándo llamar a un profesional:
- La válvula está en un lugar estrecho
- No está seguro de su instalación de fontanería
- Los códigos locales exigen una instalación profesional
- Prefieres no arriesgarte a que se inunde tu sótano
Comparación de costes:
- BRICOLAJE: $15-50 para la válvula
- Profesional: $150-300 total
¿La diferencia? Tranquilidad y cobertura de garantía.
Consejos de mantenimiento para prolongar la vida útil de las válvulas antirretorno
¿Quieres que tu válvula de retención dure más? He aquí cómo:
Pruebas periódicas
Pruebe su válvula de retención cada 6 meses utilizando el método que he descrito anteriormente. Detectar los problemas a tiempo ahorra dinero.
La calidad del agua importa
El agua dura destruye las válvulas de retención más rápidamente. Considérelo:
- Instalación de un descalcificador
- Lavado regular del depósito
- Uso de válvulas de latón de calidad en lugar de plástico
Inspección anual
Cuando realice el mantenimiento anual de su calentador de agua:
- Inspeccione visualmente la válvula de retención
- Busque corrosión o fugas
- Comprobar que el montaje es seguro
Sustituir de forma proactiva
Las válvulas de retención son baratas. Los daños por agua no lo son. Sustitúyalas cada 5-7 años como mantenimiento preventivo.
Consideraciones especiales para diferentes sistemas
No todas las instalaciones de calentadores de agua son iguales.
Calentadores de agua sin depósito
Suelen llevar válvulas antirretorno integradas. Compruebe la ubicación exacta en el manual.
Calentadores de agua para vehículos recreativos
Suelen tener válvulas de retención en el lado de salida. El espacio es reducido, por lo que el acceso puede ser complicado.
Sistemas de recirculación
Puede tener varias válvulas de retención. Cada una cumple una función específica para evitar el flujo no deseado.
Calentadores solares de agua
A menudo requieren válvulas antirretorno especiales para altas temperaturas. No utilice válvulas estándar en este caso.
Cuándo actualizar su válvula antirretorno
A veces, sustituir no es suficiente. Necesita una mejora.
Considere la posibilidad de actualizar cuando:
- Pasar del plástico al latón
- Añadir un sistema de recirculación
- Problemas crónicos de reflujo
- Los códigos locales cambian
Las válvulas antirretorno modernas ofrecen:
- Mejores caudales
- Funcionamiento más silencioso
- Mayor vida útil
- Mayor resistencia a la temperatura
Lo esencial
Encontrar la válvula de retención de su calentador de agua es sólo el primer paso.
Entender cómo funciona, reconocer los problemas y mantenerlo adecuadamente: eso es lo que realmente importa.
Acuérdate:
- La mayoría de las válvulas antirretorno están en la entrada de agua fría
- Busque la flecha de dirección del flujo
- Pruebas periódicas para detectar los problemas a tiempo
- No ignore los síntomas de fracaso
Una válvula de retención que funcione correctamente ahorra energía, evita daños y mantiene el agua caliente donde debe estar.
¿Y esa pequeña válvula? Vale cada céntimo cuando evita que el agua caliente se acumule en las tuberías de agua fría o que el calentador de agua funcione constantemente.
Dedica unos minutos este fin de semana a localizar y probar el tuyo. Tu futuro yo (y tus facturas de la luz) te lo agradecerán.
¿Dónde está la válvula de retención del calentador de agua? Ahora ya sabe exactamente dónde buscar y qué hacer cuando la encuentre.