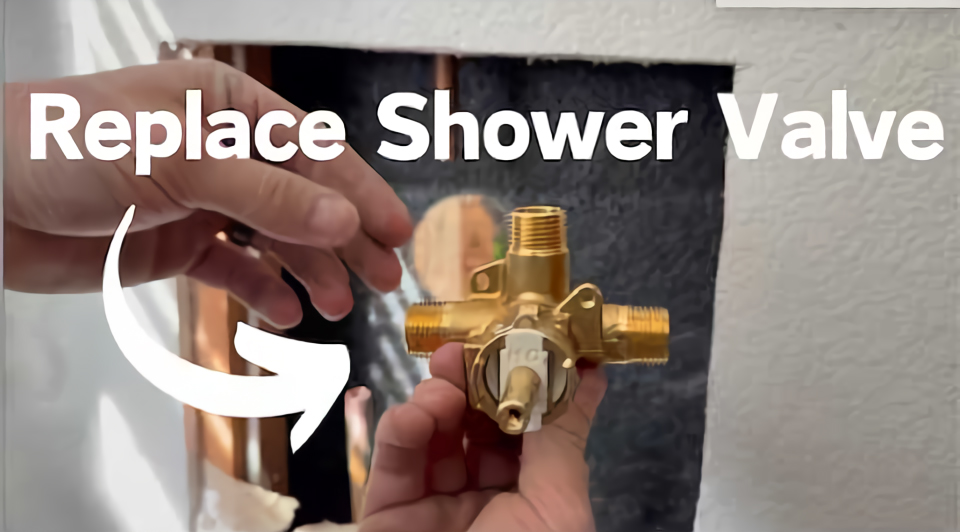
Estamos en 2025 y esa válvula de ducha que gotea sigue volviéndote loco. Lo entiendo: una válvula de ducha defectuosa puede causar todo tipo de problemas, desde fluctuaciones de temperatura y baja presión del agua hasta goteo incesante.
Sustituir una válvula de ducha puede parecer intimidante, pero como profesional fabricante de válvulasEstoy aquí para guiarte paso a paso por todo el proceso. Con un poco de trabajo manual, ¡podrás cambiar esa válvula rota por una nueva y reluciente en un abrir y cerrar de ojos!
En esta completa guía, aprenderá:
- Los signos más comunes de que su válvula de ducha necesita ser sustituida
- Las herramientas y piezas que necesitarás para este proyecto
- Cómo desmontar el cartucho o el conjunto de su antigua válvula de ducha
- Consejos para instalar correctamente una nueva válvula de ducha
- Cómo comprobar si hay fugas y realizar ajustes
¡Empecemos!
Índice
¿Por qué sustituir una válvula de ducha defectuosa?
Hay algunos signos evidentes que indican que ha llegado el momento de sustituir su válvula de ducha:
- La ducha gotea cuando está "apagada. Esto es una clara señal de que las juntas de su válvula se han desgastado. Con el tiempo, los minerales del agua desgastan las juntas de goma.
- Es difícil regular la temperatura del agua. Si le cuesta encontrar la temperatura "justa" en la ducha, es probable que la válvula tenga piezas defectuosas. Esto dificulta el equilibrio entre el calor hirviente y el frío glacial.
- La temperatura del agua fluctúa aleatoriamente. Los picos de temperatura son increíblemente molestos (¡por no decir peligrosos!). Esto apunta a válvulas o conductos de suministro defectuosos.
- La presión del agua parece débil. Aunque la baja presión puede deberse a otros problemas, una válvula defectuosa puede provocar una restricción del caudal.
¿Tiene alguno de estos problemas? En ese caso, la sustitución de esa válvula de ducha desgastada debe encabezar su lista de tareas pendientes.
Cómo sustituir una válvula de ducha: Paso a Paso
Sustituir una válvula de ducha no es muy difícil, pero requiere cortar el suministro de agua de la casa. Asegúrese de dedicar unas 2-3 horas a este proyecto si va a cambiar el cartucho de la válvula. Sustituir todo el conjunto de la válvula lleva entre 3 y 5 horas.
Aquí tiene un resumen de lo que hay que hacer:
Suministros necesarios
Antes de iniciar cualquier proyecto de fontanería doméstica, es esencial reunir todas las herramientas y piezas de repuesto necesarias. Esto es lo que necesitará para instalar una válvula de ducha:
- Llaves ajustables
- Alicates de canal
- Destornillador de estrella
- Destornillador plano
- Cinta de teflón
- Válvula o cartucho de ducha de repuesto
- Posiblemente una amoladora angular para abrir la cavidad de la pared
Cierre el suministro de agua y retire la manivela
El primer paso consiste siempre en cortar el agua en la tubería principal de suministro. Así evitará sorpresas desagradables a mitad del proyecto. Una vez cortada el agua, retire la maneta de la válvula de la ducha y la placa embellecedora para acceder a los componentes de la válvula.
Inspeccione la válvula y abra la pared si es necesario
Antes de desmontar nada, inspeccione visualmente el estado de la configuración de la válvula de ducha existente. Si puede acceder a la válvula simplemente retirando la tapa del embellecedor, ¡genial! Si el acceso a la válvula está restringido dentro de la pared, corte con cuidado los azulejos de la mampara de ducha con una amoladora angular.
Retire el cartucho viejo y prepare el nuevo
Utilice unos alicates de bloqueo para soltar el clip de retención de la válvula y, a continuación, extraiga el cartucho desgastado. Limpie a fondo el cuerpo de la válvula y envuelva las roscas de las tuberías con cinta de teflón nueva para preparar el cartucho nuevo.
Instalar válvula de sustitución
Inserte con cuidado el nuevo cartucho de la válvula de repuesto en el cuerpo de la válvula de la ducha y, a continuación, vuelva a fijarlo con el clip de sujeción. O, si va a instalar un conjunto de válvula completamente nuevo, conéctelo correctamente a las tuberías de suministro de agua caliente y fría de la vivienda.
Compruebe si hay fugas
El momento de la verdad Vuelva a abrir lentamente el suministro principal de agua y compruebe cuidadosamente que no haya goteos. Si detecta fugas alrededor de los nuevos racores de la válvula, apriételos con unos alicates. A continuación, gire la válvula de caliente a fría varias veces mientras comprueba que funciona sin problemas.
Reinstale la moldura y ponga el agua a toda potencia
Si todo va bien y la nueva válvula funciona sin problemas, vuelva a colocar el embellecedor cromado de la válvula. A continuación, someta la válvula de ducha a una última prueba real poniendo la ducha a máxima presión.
Muy bien, ahora vamos a ir a través de cada paso de la sustitución de una válvula de ducha con más detalle.
Extracción del cartucho de la válvula de ducha antigua
Si el acceso lo permite, puede sustituir sólo el cartucho de la válvula. Así se ahorra tener que sustituir todo el cuerpo de la válvula.
He aquí cómo extraer un cartucho viejo y gastado:
Cierre el suministro principal de agua
Localice la válvula principal de corte de agua de su vivienda y gírela hasta la posición de cierre total. Suele estar cerca del contador de agua o de la tubería principal de entrada.
A continuación, abre los grifos cercanos para liberar presión y vaciar las tuberías. Así evitarás salpicaduras al retirar los accesorios.
Desmontar el asa Placa y cubierta
Utilice un destornillador plano pequeño para levantar con cuidado la tapa del embellecedor de la maneta que rodea la válvula de la ducha. De este modo quedará al descubierto el tornillo que sujeta la maneta.
Algunas asas tienen el tornillo de cierre oculto bajo una tapa de plástico. Quítala con los pulgares para descubrir el cierre.
Quitar el mango de la ducha
Con la tapa quitada, utilice un destornillador Phillips para aflojar el tornillo de sujeción de la empuñadura. Este tornillo puede requerir una llave Allen en algunos modelos.
Mueva con cuidado el conjunto de la empuñadura para liberarlo. Colóquelo a un lado sin perder ninguna pieza pequeña para su posterior reinstalación.
Separe el clip del cartucho y extráigalo
Mire hacia abajo en el cuerpo abierto de la válvula con una linterna. Localice e identifique la banda metálica que sujeta el cartucho en el interior.
Utilice unos alicates de punta de aguja para sujetar firmemente el clip y retirarlo. Tenga cuidado de no dejarlo caer por las tuberías.
Con el clip de retención fuera del camino, sujete el vástago del cartucho con unos alicates y gírelo con cuidado en el sentido contrario a las agujas del reloj. Extraiga lentamente y manténgalo en posición vertical para evitar derrames dentro de la pared.
Limpie a fondo cualquier suciedad, depósitos minerales y desechos dentro del cuerpo de la válvula con un cepillo de alambre pequeño y un trapo antes de instalar el reemplazo.
Instalación de un nuevo cartucho de válvula de ducha
Una vez que haya sacado el cartucho viejo y haya limpiado a fondo las piezas interiores, estará listo para colocar su nuevo y reluciente cartucho de válvula de ducha.
Suele durar menos de 60 minutos si no surgen complicaciones.
Cartucho de preparación y cuerpo de la válvula
Inspeccione minuciosamente el nuevo cartucho en busca de grietas, astillas o imperfecciones. Verifique que el modelo sea idéntico al que retiró.
Compruebe por última vez la limpieza del interior de la válvula. Las rozaduras y las partículas pueden impedir el movimiento suave del cartucho.
Inserte correctamente el cartucho nuevo
Al insertar el cartucho nuevo, observe que suele haber un indicador de "Caliente". Asegúrese de que el indicador del lado caliente esté alineado con la tubería de agua caliente cuando esté completamente insertado.
De lo contrario, acabarás con los mangos invertidos CALIENTES y FRÍOS.
Sustituir el clip de retención
Con el cartucho completamente insertado hasta la profundidad correcta, vuelva a colocar el clip de retención metálico utilizando unos alicates de bloqueo.
Consejo: Comprima ligeramente la pinza para hacerla más estrecha y facilitar su inserción en la ranura poco profunda de la válvula.
Prueba de funcionamiento de la válvula
Conecte un pequeño tramo de tubería a la salida de la válvula para poder accionar el cartucho para las pruebas.
Vuelva a abrir lentamente el suministro principal de agua y compruebe que el cartucho gira suavemente y que no hay fugas alrededor del cuerpo. Apriete el clip si es necesario.
Vuelva a instalar la manija y las cubiertas
Si todo va bien, termine la sustitución de la válvula de la ducha colocando los embellecedores y las tapas decorativas de la maneta.
Gira con cuidado la válvula con fuerza varias veces para asegurar un sellado correcto. Después, ¡date una buena ducha caliente para celebrarlo!
Sustitución de un conjunto de válvula de ducha
Si el propio cuerpo de la válvula existente está agrietado o tan gravemente corroído que no sella, será necesario sustituir todo el conjunto de la válvula.
Esto implica cortar la pared para acceder a las tuberías de suministro. No es un proyecto para tímidos, así que llama a un fontanero si tienes dudas.
Estos son los pasos básicos:
Cierre el suministro de agua doméstico
Al igual que con la sustitución del cartucho, el primer paso es cerrar la válvula principal de entrada de agua y abrir un grifo para aliviar la presión del sistema.
Cortar la pared del recinto abierto
Lamentablemente, para sustituir un conjunto completo de válvula de ducha es necesario abrir la mampara.
Corte con cuidado los azulejos de la ducha alrededor de la zona de la válvula con una amoladora angular para dejar al descubierto la estructura interior de madera. Utilice protección ocular.
Separe las líneas de suministro y retírelas
Con la válvula ahora accesible, separe las líneas de suministro de agua caliente y fría de la parte trasera. Espere algunos derrames, así que tenga trapos listos.
Dar a los tubos un buen giro a izquierda y derecha mientras se tira hacia fuera con unos alicates para extraer completamente el cuerpo de la válvula averiada.
Coloque el nuevo conjunto de la válvula
Limpie a fondo la abertura y prepare las nuevas juntas de las tuberías con cinta de teflón nueva, si procede. Consulte las instrucciones del fabricante de la válvula.
Monte y oriente correctamente el repuesto, con la entrada de agua caliente en el lado izquierdo. Apriete a fondo todos los racores de compresión o roscados nuevos.
Volver a cerrar la pared y probar
Suponiendo que no haya goteos ni fugas, repare cuidadosamente la abertura utilizando placas de cemento y baldosas nuevas. Vuelva a abrir lentamente el grifo y compruebe minuciosamente su trabajo.
Prevea realizar varios ciclos de frío/calor probando la nueva válvula antes de que esté plenamente operativa. Si surgen problemas de presión o goteo en los accesorios, corte inmediatamente el suministro principal y vuelva a realizar las conexiones. Las fugas desatendidas causan daños importantes en las paredes y el techo.
Cuando esté totalmente seguro de los resultados positivos, termine reinstalando todos los adornos cosméticos y realice una ducha prolongada para verificar el funcionamiento perfecto.
Lo esencial
Y ahí lo tiene: una guía completa de principio a fin para sustituir un cartucho de válvula de ducha o un conjunto completo de válvula de ducha.
Como puede ver, cambiar una válvula nueva no es muy complicado si se dispone de las herramientas y los materiales adecuados. Trabaja despacio, compruébalo todo dos veces y no tengas miedo de llamar a un fontanero si el proyecto empieza a torcerse.
¡Por unas duchas sin dolores de cabeza y un agua caliente fácilmente regulable en 2025!