Já se perguntou porque é que a sua canalização faz aqueles sons irritantes de gorgolejo? Ou porque é que o seu sistema de rega não está a funcionar como deveria?
A questão é a seguinte: provavelmente precisa de um válvula de ar.
Instalei dezenas de válvulas de ar ao longo dos anos. E aprendi que, se o fizer corretamente à primeira, evita enormes dores de cabeça no futuro.
Neste guia, como profissional fabricante de válvulas de arvou mostrar-lhe exatamente como instalar válvula de ar sistemas para diferentes aplicações. Quer se trate de sistemas de canalização, irrigação ou água, tenho tudo o que precisa.
Parece-lhe bem? Vamos mergulhar.
Índice
- O que é uma válvula de ar (e porque é que precisa de uma)
- Tipos de válvulas de ar que irá encontrar
- Antes de começar: Preparação essencial
- Como instalar a válvula de ar: Instruções passo a passo
- Erros comuns a evitar
- Dicas de manutenção que o farão poupar dinheiro
- Dicas de instalação avançadas
- Escolher a válvula de ar correta
- Resolução de problemas comuns
- A ciência por detrás das válvulas de ar
- Considerações especiais para diferentes aplicações
- Ferramentas de que vai realmente precisar
- Considerações finais
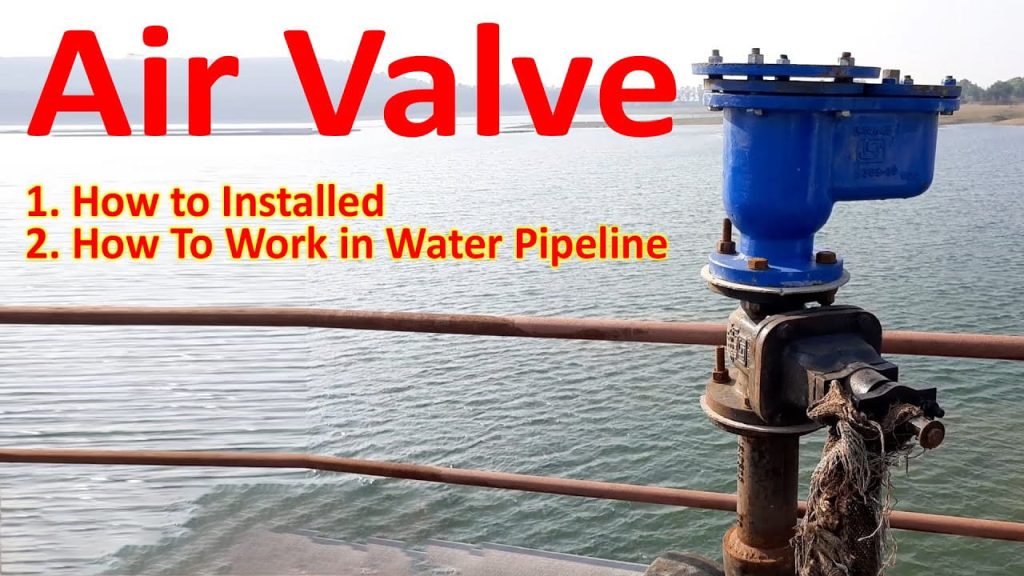
O que é uma válvula de ar (e porque é que precisa de uma)
Um válvula de ar é como o herói desconhecido dos seus sistemas de água.
Pense nisto desta forma:
Quando a água flui através dos tubos, cria bolsas de ar. Estas bolsas de ar causam todo o tipo de problemas:
- Redução da pressão da água
- Tubos ruidosos
- Danos no sistema
- Funcionamento ineficaz
Mas a questão é a seguinte:
As válvulas de ar libertam automaticamente este ar retido. Também deixam o ar voltar a entrar quando necessário (como durante a drenagem).
O resultado? O seu sistema funciona de forma suave e silenciosa.
Tipos de válvulas de ar que irá encontrar
Nem todas as válvulas de ar são iguais.
Eis os principais tipos com que trabalho:
1. Válvulas de admissão de ar (AAV)
Estes são os seus acessórios para sistemas de canalização e drenagem. Evitam que os gases dos esgotos entrem em sua casa e permitem a entrada de ar no sistema de drenagem.
2. Válvulas de libertação de ar
Perfeitos para sistemas de irrigação e distribuição de água. Libertam continuamente pequenas bolsas de ar durante o funcionamento normal.
3. Válvulas de ar combinadas
O canivete suíço das válvulas de ar. Lidam com grandes volumes de ar durante o enchimento/drenagem E com pequenas bolsas de ar durante o funcionamento.
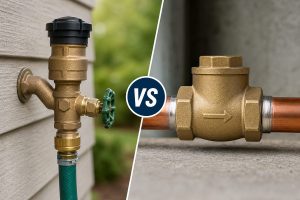
4. Válvulas de retenção
Válvulas unidireccionais que impedem o refluxo. Comum em instalações de aquários e aplicações específicas de canalização.
Antes de começar: Preparação essencial
Deixem-me poupar-vos algum trabalho.
Antes de tocar em qualquer canalização, eis o que é necessário verificar:
1. Códigos locais
Algumas zonas têm requisitos específicos para válvula de ar instalação. (Confie em mim, não vai querer refazer tudo por causa de uma violação do código).
2. Compatibilidade do sistema
Certifique-se de que a sua válvula corresponde ao material do tubo. Válvulas de PVC para tubos de PVC, latão para cobre, etc.
3. Dimensionamento correto
Uma válvula subdimensionada não funciona corretamente. Uma válvula sobredimensionada é um exagero e é cara.
Dica profissional: Em caso de dúvida, consulte a tabela de dimensionamento do fabricante com base no caudal do seu sistema.
Como instalar a válvula de ar: Instruções passo a passo
Instalação de uma válvula de admissão de ar (debaixo do lava-loiça)
Esta é a instalação residencial mais comum.
Passo 1: Escolha a sua localização
A válvula deve ser instalada:
- Acima da borda do nível de inundação dos equipamentos
- A menos de 15 graus da vertical
- Pelo menos 4-6 polegadas acima do dreno horizontal do ramal
Passo 2: Cortar o tubo
Desligar o abastecimento de água. De seguida:
- Medir e marcar o local onde o AAV será colocado
- Cortar o tubo de forma limpa com um corta-tubos
- Rebarbar e chanfrar os bordos
Passo 3: Instalar o adaptador
- Aplicar primário para PVC no tubo e no adaptador
- Aplicar o cimento PVC
- Empurrar o adaptador para o tubo com um movimento de torção
- Manter durante 30 segundos
Passo 4: Fixar a válvula
É aqui que as pessoas fazem muitas vezes asneira:
- Envolver a fita Teflon no sentido dos ponteiros do relógio nas roscas da válvula (3-4 voltas)
- Apertar manualmente a válvula no adaptador
- Utilizar fechos de canal para um quarto de volta adicional (não apertar demasiado!)
Passo 5: Teste o seu trabalho
- Voltar a ligar a água
- Passar água pelo lava-loiça
- Verificar a existência de fugas
- Verificar o funcionamento correto da válvula
Instalação de uma válvula de libertação de ar (sistema de rega)
Os sistemas de irrigação requerem uma atenção especial.
Passo 1: Encontrar os pontos altos
O ar acumula-se naturalmente nos pontos altos do seu sistema. É aí que se encontram as válvulas.
Passo 2: Instalar primeiro uma válvula de isolamento
Isto é crucial para a manutenção:
- Instalar uma válvula de esfera ou uma válvula de gaveta antes da válvula de ar
- Certifique-se de que está "full port" (não reduzido)
Etapa 3: Criar um suporte vertical
A válvula DEVE estar na vertical:
- Utilize um encaixe em T na sua linha principal
- Instalar um tubo vertical (do mesmo diâmetro que o orifício da válvula)
- Fixe-o a um poste ou a uma estaca para o manter na vertical
Passo 4: Ligar o Válvula de ar
Dependendo do material do tubo:
- PVC: Utilizar a soldadura por solvente
- Aço: Soldar um casquilho roscado
- Polietileno: Utilizar um grampo de selim
Passo 5: Adicionar uma câmara de coleção
Para sistemas com ciclos frequentes:
- Utilizar um tê maior ou uma câmara expandida
- Isto dá ao ar mais espaço para se recolher
- Resulta num melhor desempenho da válvula
Erros comuns a evitar
Já vi estes erros centenas de vezes:
1. Instalação num ângulo
As válvulas de ar funcionam melhor a menos de 5 graus da vertical. Mais do que isso e o mecanismo de flutuação falha.
2. Utilização de válvulas de orifício reduzido
Isto restringe o fluxo de ar e anula o objetivo.
3. Esquecer a acessibilidade
Terá de efetuar a manutenção destas válvulas. Não as enterre nem as coloque em locais impossíveis.
4. Tipo de válvula incorreto
Utilizando um válvula de ar num sistema de esgotos? Isso é pedir para entupir. Em vez disso, utilize válvulas específicas para águas residuais.
Dicas de manutenção que o farão poupar dinheiro
Eis o que faço para manter as válvulas de ar a funcionar corretamente:
Inspeção regular (de 6 em 6 meses)
- Verificar se existem danos visíveis
- Procurar sinais de fugas
- Verificar se a válvula continua a mover-se livremente
Limpeza anual
- Retirar a tampa da válvula
- Limpar com um detergente suave
- Verificar e substituir os O-rings, se necessário
- Aplicar lubrificante de silicone nas peças móveis
Procedimento de ensaio
- Deitar água na válvula
- Deve fechar-se quando estiver cheio
- Abrir uma torneira a jusante
- A válvula deve abrir-se para deixar entrar o ar
Dicas de instalação avançadas
Quer melhorar o seu jogo de instalação?
Para sistemas de válvulas múltiplas
Em sistemas complexos, podem ser necessárias várias válvulas:
- Espaçá-los a cada 800 metros em corridas longas
- Instalar estações de bombagem a jusante
- Colocá-los antes das válvulas redutoras de pressão
- Adicione-os depois dos medidores de caudal
Para áreas problemáticas
Tem problemas persistentes com o ar? Experimente isto:
- Instalar válvulas combinadas em vez de válvulas de finalidade única
- Utilizar flutuadores de aço inoxidável em águas agressivas
- Adicionar orifícios de drenagem para facilitar a manutenção
Para uma eficiência máxima
Os pequenos pormenores são importantes:
- Utilizar cola para tubos E fita de Teflon nas roscas metálicas
- Instalar as válvulas antes de o sistema ser pressurizado
- Teste com diferentes caudais
Escolher a válvula de ar correta
Não tem a certeza de qual a válvula a comprar?
Eis a minha árvore de decisão:
Para canalizações residenciais: Válvulas AAV (marcas Oatey ou Studor)
Para irrigação: Válvulas de ar combinadas com grandes orifícios
Para esgotos: Válvulas de ar para águas residuais com design anti-entupimento
Para sistemas de alta pressão: Válvulas de libertação de ar com mola
O preço varia entre $15 para AAVs básicas e $500+ para grandes válvulas combinadas.
Resolução de problemas comuns
Mesmo com uma instalação perfeita, podem surgir problemas.
A válvula não fecha
Causa: Detritos no selo
Fixar: Retirar e limpar a válvula
Libertação de ar constante
Causa: Sistema a puxar ar para outro lado
Fixar: Verificar a existência de fugas no lado de aspiração
Água a jorrar da válvula
Causa: Válvula instalada demasiado baixo
Fixar: Elevar a válvula mais alto no sistema
A ciência por detrás das válvulas de ar
Compreender o porquê ajuda a compreender o como.
O ar entra nos tubos através de:
- Bombas que extraem o ar dissolvido da água
- Juntas com fugas sob vácuo
- Reacções químicas (especialmente nas águas residuais)
- Tubos vazios durante o arranque
Sem uma ventilação adequada, obtém-se:
- 30% redução do rendimento da bomba
- Corrosão acelerada dos tubos
- Danos por golpe de aríete
- Medidores de caudal imprecisos
É por isso que uma instalação correta é tão importante.
Considerações especiais para diferentes aplicações
Instalação residencial
- Foco na redução do ruído
- A estética é mais importante
- Acessibilidade para os proprietários
Sistemas agrícolas
- Durabilidade em vez de aparência
- Grandes orifícios para caudais elevados
- Proteção contra o gado
Sistemas municipais de água
- AWWA cumprimento das normas
- Compatibilidade SCADA
- Planeamento da redundância
Ferramentas de que vai realmente precisar
Não se preocupe com as coisas extravagantes. Aqui está o que realmente importa:
Ferramentas essenciais:
- Corta-tubos ou serra
- Fita de teflon
- Fechos de canal
- Nível (a sério, não salte esta parte)
- Vedante de roscas
É bom ter:
- Ferramenta de rebarbação de tubos
- Chave dinamométrica
- Medidor de pressão digital
Considerações finais
A instalação de válvulas de ar não é uma ciência espacial. Mas fazê-lo corretamente requer atenção aos detalhes.
As principais conclusões:
- Escolha o tipo de válvula correto para a sua aplicação
- Instalar na vertical (sempre!)
- Tamanho adequado para o seu sistema
- Torná-lo acessível para manutenção
- Testar cuidadosamente antes de dar o trabalho por terminado
Lembre-se: Uma instalação correta válvula de ar é invisível. Esquece-se que está lá, porque o seu sistema simplesmente funciona.
Mas saltar etapas ou cortar caminho? Vai lembrar-se disso de cada vez que ouvir aquele som gorgolejante ou lidar com a pressão reduzida.
O resultado final?
Demore o tempo que for necessário para a instalação. Faça-a corretamente uma vez e desfrutará de anos de funcionamento sem problemas.
Isso é como instalar válvula de ar sistemas da forma correta.
Os seus canos (e a sua sanidade) vão agradecer-lhe.