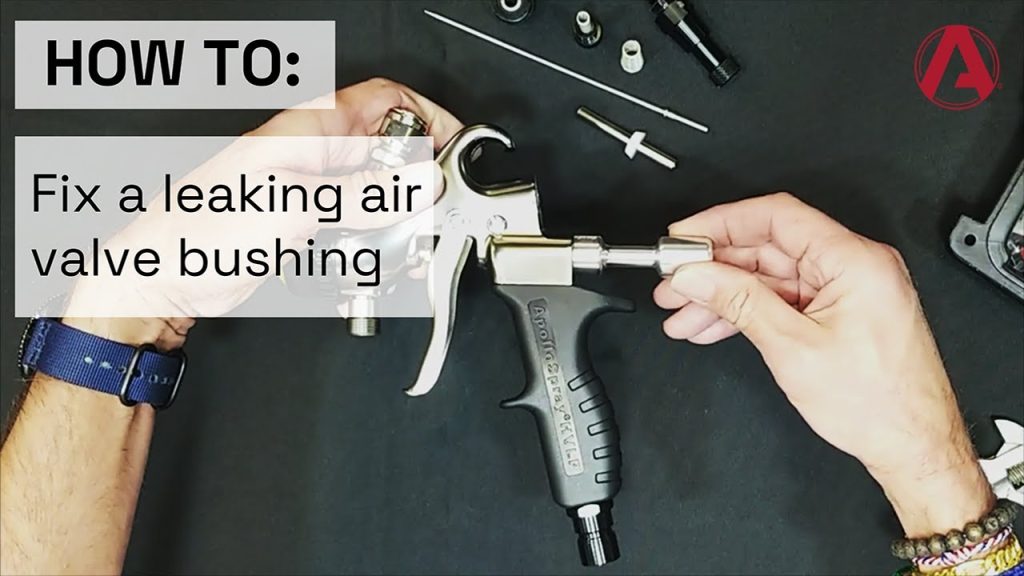
Hat ein Leck Luftventil die Sie in den Wahnsinn treibt?
So sieht es aus: Wie man ein Leck repariert Luftventil hängt davon ab, mit welcher Art von Ventil Sie es zu tun haben und woher das Leck kommt. Aber die gute Nachricht? Die meisten undichten Ventile lassen sich mit einfachen Werkzeugen in weniger als 10 Minuten reparieren.
Ich habe im Laufe der Jahre Hunderte von undichten Ventilen repariert. Und in diesem Leitfaden, als Profi Luftventil Hersteller, zeige ich Ihnen genau, wie Sie alle Arten von Problemen diagnostizieren und reparieren können. Luftventil Leckagen - von Reifenventilen bis zu pneumatischen Systemen.
Lassen Sie uns gleich eintauchen.
Inhaltsübersicht
Wie kommt es zu undichten Luftventilen?
Bevor wir uns an die Reparaturen machen, müssen Sie verstehen, WARUM Ventile überhaupt undicht sind.
Nach meiner Erfahrung ist 90% von Luftventil undichte Stellen sind auf diese Probleme zurückzuführen:
Lose Ventileinsätze - Der häufigste Übeltäter. Ventileinsätze können sich mit der Zeit durch Vibrationen und Temperaturschwankungen lösen.
Beschädigte Ventilschäfte - Gummiventilschäfte nutzen sich mit der Zeit ab. UV-Belastung und Witterungseinflüsse können Risse an der Basis verursachen.
Verschmutzte oder korrodierte Teile - Ablagerungen und Korrosion verhindern eine ordnungsgemäße Abdichtung. Selbst ein winziger Schmutzfleck kann zu einer anhaltenden Leckage führen.
Verschlissene Dichtungen und Dichtungsringe - Interne Dichtungen nutzen sich mit der Zeit ab. Dies ist vor allem bei stark beanspruchten pneumatischen Ventilen üblich.
Die Quintessenz? Die meisten Lecks lassen sich einfach beheben, ohne dass die gesamte Ventilbaugruppe ausgetauscht werden muss.
Wie man ein undichtes Luftventil repariert
Schritt 1: Finden Sie die genaue Leckstelle
Man kann nicht reparieren, was man nicht findet.
Der erste Schritt besteht also darin, festzustellen, wo genau die Luft entweicht.
Das ist meine bevorzugte Methode:
Der Seifenwasser-Test
Mischen Sie ein paar Tropfen Spülmittel mit Wasser in einer Sprühflasche. (Profi-Tipp: Dawn funktioniert am besten, weil es dauerhaft Blasen erzeugt).
Sprühen Sie die Mischung großzügig auf:
- Die Ventilspitze
- Um den Ventilsockel herum
- Alle sichtbaren Verbindungen
Achten Sie auf Blasen. Wachsende Blasen = Luftleck.
Diese Methode funktioniert für JEDEN Typ von Luftventil - Reifenventile, pneumatische Armaturen, Druckluftsysteme und vieles mehr.
Hören Sie auf das Leck
Manchmal kann man tatsächlich hören, wie die Luft herauszischt. Gehen Sie nahe an das Ventil heran und hören Sie genau hin. Je lauter das Zischen ist, desto größer ist das Leck.
Legen Sie Ihre Hand in die Nähe der verdächtigen Stellen. Sie werden einen Luftstrom spüren, wenn es ein größeres Leck gibt.
Schritt 2: Sammeln Sie Ihre Werkzeuge
Welche Werkzeuge Sie benötigen, hängt von Ihrem Ventiltyp ab.
Für Reifenventile (am häufigsten), benötigen Sie:
- Ventileinsatzwerkzeug (4-Wege-Werkzeug funktioniert hervorragend)
- Ersatz-Ventileinsätze
- Schutzbrille
- Luftdruckmesser
- Pumpe oder Kompressor
Für pneumatische Ventile, hinzufügen:
- Geeignete Schraubenschlüssel
- Gewindedichtmittel oder Teflonband
- Ersatz-O-Ringe oder -Dichtungen
Die Sache ist die: Ein einfaches Ventileinsatzwerkzeug kostet etwa $5 und kann Sie vor teuren Reparaturen bewahren. Jeder Heimwerker sollte eines haben.
Schritt 3: Einen losen oder verschmutzten Ventileinsatz reparieren
Dies ist bei weitem die einfachste Lösung. Und sie behebt die meisten undichten Reifenventile.
Versuchen Sie zunächst, den vorhandenen Kern zu straffen:
- Entfernen Sie die Ventilkappe
- Setzen Sie Ihr Ventileinsatzwerkzeug ein
- Zum Anziehen im Uhrzeigersinn drehen (fest, nicht zu fest)
- Erneuter Test mit Seifenwasser
Immer noch undicht? Dann wird es Zeit, den Kern auszutauschen:
- Vollständig entlüften - Dies ist entscheidend für die Sicherheit. Ein Ventileinsatz kann unter Druck wie ein Geschoss herausschießen.
- Schrauben Sie den alten Kern gegen den Uhrzeigersinn ab
- Auf Schäden oder Verschmutzungen untersuchen
- Neuen Kern einbauen (handfest plus 1/4 Umdrehung)
- Erneut aufblasen und testen
Ich habe schon Ventileinsätze gesehen, die so korrodiert waren, als wären sie in Säure getaucht worden. Im Zweifelsfall sollte man sie einfach ersetzen. Neue Kerne kosten nur ein paar Cent.
Schritt 4: Probleme mit Ventilschäften beheben
Wenn das Leck am Ventilschaft sitzt (häufig bei älteren Reifen), haben Sie ein größeres Problem.
Anzeichen für ein Versagen des Ventilschafts:
- Risse im Gummi
- Blasenbildung an der Verbindung zwischen Rad und Vorbau
- Spindel bewegt sich beim Wackeln
Leider erfordert der Austausch von Ventilschäften in der Regel eine Reifendemontage. Hier ist der Grund dafür:
Der Vorbau wird von der Innenseite des Reifens durch das Rad geführt. Sie benötigen Zugang zur Innenseite, um den alten Vorbau herauszudrücken und den neuen hineinzuziehen.
Allerdings habe ich diese provisorische Lösung bereits erfolgreich bei kleineren Leckagen am Schaft eingesetzt:
- Gründlich um den Stielansatz herum reinigen
- Gummikitt oder Ventilschaftdichtmittel auftragen
- Gemäß den Anweisungen aushärten lassen
- Beobachten Sie genau - dies ist nur vorübergehend!
Für eine dauerhafte Reparatur, besuchen Sie einen Reifenladen. Sie können den Vorbau für $10-30 pro Reifen ersetzen.
Verschiedene Ventiltypen und ihre Macken
Nicht alle Luftventile sind gleich. Ich möchte die gängigsten Typen aufschlüsseln:
Schrader-Ventile
Dies sind die Standard-Reifenventile, wie sie an Autos, Fahrrädern und den meisten pneumatischen Geräten verwendet werden.
Merkmale:
- Federbelasteter Stift in der Mitte
- Herausnehmbarer Ventileinsatz
- Sehr verbreitet und leicht zu warten
Allgemeine Probleme:
- Lose Kerne (80% der Probleme)
- Beschädigte Stiftfedern
- Korrodierte Gewinde
Presta-Ventile
Zu finden bei hochwertigen Fahrrädern und einigen Spezialanwendungen.
Wesentliche Unterschiede:
- Dünner als Schrader
- Kontermutter oben
- Einige haben nicht herausnehmbare Kerne
Besondere Überlegungen:
- Erfordert Presta-spezifische Tools
- Zarter als Schrader
- Kontermutter muss vor dem Aufpumpen geöffnet werden
Pneumatische Systemventile
In Industrie- und Werkstattluftanlagen werden verschiedene Ventiltypen verwendet.
Häufige Probleme:
- Verschlissene O-Ringe
- Beschädigte Sitzflächen
- Verunreinigung durch Feuchtigkeit/Öl
Diese erfordern oft eine Demontage und den Austausch von Dichtungen und nicht nur einen einfachen Austausch des Kerns.
Erweiterte Fehlersuche
Manchmal funktionieren die Standardreparaturen nicht. Hier ist, was Sie als nächstes überprüfen sollten:
Anhaltende Kernlecks
Wenn neue Kerne weiterhin undicht sind:
- Prüfen Sie das Gewinde des Ventilkörpers - Verwenden Sie das Gewindebohrerende Ihres Ventilwerkzeugs, um Innengewinde zu reinigen.
- Auf Risse untersuchen - Haarrisse im Ventilkörper bedeuten Austauschzeit
- Versuchen Sie eine andere Kernmarke - Die Qualität schwankt erheblich
Temperaturbedingte Lecks
Kaltes Wetter kann dazu führen:
- Schrumpfung der Dichtung
- Erhöhte Leckraten
- Druckabfall auch ohne Leckagen
Lösung: Prüfen und regulieren Sie den Druck, wenn die Temperaturen stabil sind.
Fragen der Kontamination
Öl, Feuchtigkeit oder Verschmutzungen in pneumatischen Systemen verursachen ständig Probleme.
Prävention ist der Schlüssel:
- Lufttrockner verwenden
- Filter einbauen
- Feuchtigkeit regelmäßig ablassen
- Ventilkappen aufbewahren
Wann Sie einen Fachmann hinzuziehen sollten
Hören Sie, ich bin sehr für Reparaturen zum Selbermachen. Aber kennen Sie Ihre Grenzen.
Rufen Sie einen Profi, wenn:
- Das Leck befindet sich an der Rad-Felgen-Verbindung
- Mehrere Korrekturen haben nicht funktioniert
- Sie haben es mit TPMS-Sensoren zu tun
- Industrielle pneumatische Systeme jenseits einfacher Ventile
Eine gute Reifenwerkstatt kann die meisten Ventilprobleme für weniger als $50 diagnostizieren und beheben. Manchmal ist das gut angelegtes Geld.
Aufschlüsselung der Kosten
Lassen Sie uns über Geld reden. Hier ist, was Sie 2025 zu zahlen haben:
DIY-Reparaturen:
- Werkzeug für Ventileinsätze: $5-15
- Ersatzkerne: $2-5 pro Packung
- Ventilschäfte: $2-10 je
- Basis-Dichtstoffe: $5-10
Professioneller Service:
- Austausch des Ventileinsatzes: $10-20
- Vorbau-Ersatz: $15-50
- TPMS-Dienst: $30-80
- Umbau eines pneumatischen Ventils: $50-200
Die Rechnung ist klar: Das Erlernen einer grundlegenden Ventilreparatur macht sich bereits nach einer Reparatur bezahlt.
Tipps zur Wartung
Vorbeugung ist immer besser als Reparatur.
So können Sie künftige Lecks vermeiden:
Monatlich prüfen - Nehmen Sie die Ventilinspektion in Ihre routinemäßigen Druckprüfungen auf.
Kappen aufbehalten - Ventilkappen sind nicht nur dekorativ. Sie halten Ablagerungen fern.
Proaktiv austauschen - Gummivorbauten sollten alle 5-7 Jahre oder bei neuen Reifen ersetzt werden.
Regelmäßig reinigen - Wischen Sie die Ventilspitzen ab, bevor Sie die Luftspannfutter anschließen.
Verwendung von Qualitätsteilen - Billige Ventileinsätze sind falsche Einsparungen
Erfolgsgeschichte aus der Praxis
Letzten Monat klopfte mein Nachbar an meine Tür. Sein Lkw-Reifen hatte täglich 5 PSI verloren.
Wir haben den Test mit Seifenwasser gemacht - massive Blasen an der Ventilspitze. Klassischer loser Kern.
Zwei Minuten mit meinem Ventilwerkzeug: Problem gelöst. Er war täglich zur Tankstelle gefahren, um Luft nachzufüllen. Eine 30-Sekunden-Reparatur ersparte ihm Stunden an Ärger.
Das ist die Stärke, wenn man die Grundlagen der Ventilreparatur kennt.
Sicherheitshinweise
Mit dem Luftdruck ist nicht zu spaßen. Befolgen Sie diese Regeln:
- Schutzbrille tragen - Immer. Keine Ausnahmen.
- Vor dem Entfernen des Kerns die Luft ablassen - Kerne können zu Geschossen werden
- Druckstufen prüfen - Überschreiten Sie nicht die Spezifikationen des Ventils
- Test nach der Reparatur - Überprüfen Sie die Korrekturen, bevor Sie sich auf den Weg machen
Die Quintessenz
Lernen wie man ein Leck repariert Luftventil ist eine dieser Fähigkeiten, die sich für immer auszahlen.
Die meisten undichten Stellen sind einfach zu beheben - lockere Kerne, verschmutzte Gewinde oder verschlissene Dichtungen. Mit einfachen Werkzeugen und 10 Minuten können Sie 90% der Ventilprobleme selbst lösen.
Beginnen Sie mit dem Seifenwassertest. Versuchen Sie, den Kern festzuziehen oder auszutauschen. Wenn dies nicht gelingt, sollten Sie prüfen, ob Sie professionelle Hilfe benötigen.
Denken Sie daran: Ein undichtes Ventil repariert sich nicht von selbst. Aber Sie wissen jetzt genau, wie Sie es selbst reparieren können.


