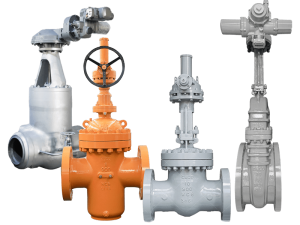
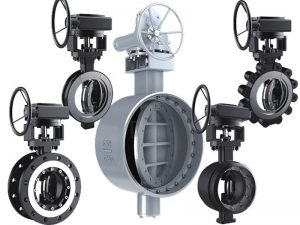
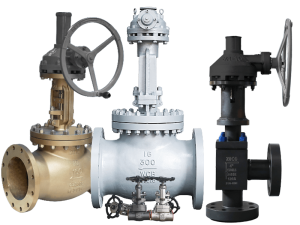
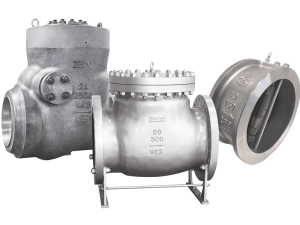
Gate valves are crucial components in plumbing and pipeline systems. Knowing how to maintain and repair gate valves enables you to restore flow when issues emerge. As a professional gate valve manufacturer, I am writing this step-by-step guide to teach you everything you need to troubleshoot, disassemble, rebuild, and replace gate valves.
Why Learn Gate Valve Repair?
Gate valves control flow in piping networks. Over time, issues like corrosion, sediment buildup, and general wear affect gate valve functionality. As a result, they may fail to close fully or get stuck. Unresolved, such problems lead to plumbing emergencies and pipeline service disruptions.
Fortunately, most gate valve problems have simple solutions. Learning basic gate valve repair empowers you to rapidly restore flow when issues emerge. It also helps you avoid the costs and delays associated with calling out a technician.
Common Gate Valve Problems
Before attempting any repairs, you need to diagnose the issue affecting your gate valve. Here are the most common gate valve problems:
Failing to Close Fully
Sediment accumulation inside the valve body prevents the gate from lowering completely. As a result, fluid continues to pass through the valve even when closed.
Getting Stuck
Internal corrosion or debris causes the gate valve to get stuck mid-travel. Users cannot fully open or close the valve.
Leaking from the Stem
Worn or damaged stem seal components allow fluid to leak out around the valve stem. Tightening the packing nut sometimes temporarily resolves minor leaks.
Gate Valve Repair Step-By-Step
Repairing most gate valve issues involves disassembling, troubleshooting, cleaning, rebuilding, and testing the valve. Here is a step-by-step overview of the gate valve repair process:
Step 1: Turn Off Service Flow
Shut off flow on the upstream and downstream sides of the gate valve. Relieve any pressure buildup by opening downstream fixtures. This depressurizes the valve and creates a safe workspace.
Step 2: Check External Factors
Examine the valve and adjacent piping for any obvious external issues. Look for damaged pipelines, faulty installation, scale buildup around the joints, etc. Address any external factors before attempting further repairs.
Step 3: Disassemble the Valve
With the flow off, detach the valve from the pipeline using a wrench. Then loosen and unscrew the valve bonnet to access the interior components. Do not loosen the packing nut or remove stem components.
Step 4: Diagnose and Service Interior Parts
Inspect the gate, seats, seals, and body interior. Check for scale buildup, corrosion damage, wear, cracks, misalignment issues, etc. Use a toothbrush and solvent to remove debris and corrosion. Replace any excessively worn or damaged parts.
Step 5: Reassemble and Test
Reinstall the gate and seats. Then reattach and tighten down the valve bonnet. Slowly restore service flow and test valve operation. Fully open and close the valve multiple times to clear any remaining debris.
Following these gate valve repair steps enables you to efficiently service most gate valves and resolve common issues. Always replace severely corroded or unreliable valves. Contact a technician for complex repairs.
How to Repair a Leaky Gate Valve
Repairing a leaky gate valve involves several steps, which can range from simple maintenance to complete replacement. Here’s a detailed guide based on the information provided:
1. Determine the Source of the Leak
Inspection: Start by identifying the exact location of the leak. Common areas include the sealing surface, stem, and connection points.
2. Safety First
Shut Off Water Supply: Before any repair, ensure the water supply to the valve is completely shut off to prevent accidents and further water loss.
3. Disassembly (If Necessary)
If the leak is due to internal issues, you may need to disassemble the valve. This step requires care and proper tools to avoid damaging the valve further.
4. Cleaning and Inspection
Remove Buildup: Clean the valve, especially if mineral buildup is suspected. Use appropriate cleaning agents and brushes.
Visual Inspection: Look for signs of corrosion, wear, or damage on the seating, stem, or other parts.
5. Replacement of Faulty Parts
Seals and Seats: Replace worn or damaged seals and seats. These are often the cause of leaks.
Stem Packing: If the leak is around the stem, replace the packing material.
6. Lubrication
Apply valve-specific lubricant to the stem threads and packing area to ensure smooth operation and prevent future leaks.
7. Reassembly and Testing
Carefully reassemble the valve, ensuring all parts are correctly positioned and tightened to manufacturer specifications.
Test for Leaks: After reassembly, turn the water supply back on and check for leaks. Use a visual inspection or place a dry cloth around the valve to detect any moisture.
8. Professional Assistance
If the valve is in an industrial setting or the leak persists, it might be best to consult a professional. Complex valves or critical systems require specialized knowledge and tools.
Replacing Gate Valves
When gate valve damage is too severe, rebuild attempts waste time and money. Replacement provides a simple, cost-effective resolution. Here is an overview of gate valve replacement options:
Install a New Gate Valve
For minor gate valve issues, installing identical replacement gate valves enables reuse of existing connections. Ensure the valve material and pressure ratings match system requirements.
Upgrade to Ball Valves
Ball valves outperform gate valves across key reliability metrics. Upgrading to full port ball valves boosts system performance. But ball valve connections differ, requiring some replumbing.
Preventing Gate Valve Failure
Regularly exercising gate valves promotes smooth operation and prevents sediment accumulation. Simply open and close each gate valve fully every three months. This sweeps debris from the flow path before it can cause problems.
Additionally, upgrade outdated iron gate valves. Modern duplex stainless steel gate valves withstand corrosion and last for decades even in demanding water applications.
Adopting these gate valve care best practices reduces repair frequencies. But despite your best efforts, gate valve issues eventually arise. By mastering the repair process, you can minimize system downtimes and service disruptions when problems emerge.


