Let me guess.
Your steam radiator is hissing like an angry cat. Or maybe it’s not heating properly. And you’re wondering if that little air valve on the side is the culprit.
You’re probably right.
Here’s the thing: learning how to replace air valve on steam radiator is one of the easiest DIY repairs you can do. And it can save you a fortune in heating bills.
In fact, as a professional air valve manufacturer, I recently helped my neighbor replace all 8 radiator vents in his house. Total time? About 2 hours. Total savings on his next heating bill? $147.
But here’s where most people mess up:
They overthink it.

Table of contents
- What Exactly Is a Steam Radiator Air Valve?
- Signs You Need to Replace Your Air Valve
- Tools and Materials You’ll Need
- Choosing the Right Replacement Valve
- How to Replace Air Valve on Steam Radiator Step-by-Step
- Common Mistakes to Avoid
- Advanced Tips for Better Heating
- When to Call a Pro
- Maintenance Tips to Extend Valve Life
- Cost Breakdown and Savings
- Troubleshooting After Replacement
- The Bottom Line
What Exactly Is a Steam Radiator Air Valve?
Before we dive into the replacement process, let’s get one thing straight.
A steam radiator air valve (also called a steam vent or air vent) is NOT the same as the big valve at the bottom of your radiator. That’s your shut-off valve.
The air valve is that small, bullet-shaped device on the side of your radiator. Usually about halfway up.
Its job? Let air escape so steam can enter.
Simple as that.
When your heating cycle starts, steam pushes the air out through this valve. Once the radiator fills with steam, the valve closes to trap the heat.
(That’s what causes that familiar hissing sound in one-pipe steam systems.)
Signs You Need to Replace Your Air Valve
How do you know when it’s time for a replacement?
Look for these red flags:
- Constant hissing when the radiator is already hot
- Steam escaping continuously
- Radiator not heating evenly or at all
- Visible cracks or damage
- Water leaking from the valve
Pro Tip: If you tap a stuck valve with a screwdriver and it starts working again, that’s a temporary fix. But it’s telling you replacement time is coming.
Tools and Materials You’ll Need
Here’s exactly what you need to get this done:
Tools:
- Adjustable wrench (or pipe wrench)
- Teflon tape
- Old cloth or rag
- Penetrating oil (optional)
Materials:
- New air valve (more on choosing the right one below)
That’s it. No special tools. No expensive equipment.
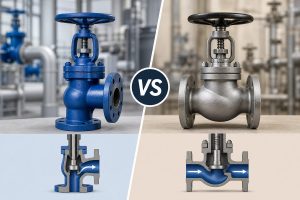
Choosing the Right Replacement Valve
This is where people get confused.
But it doesn’t have to be complicated.
Brand Matters
Stick with these trusted brands:
- Hoffman (my personal favorite)
- Gorton
- Heat-Timer Varivalve
Avoid the cheap knock-offs. They’ll fail within months.
Size Matters Too
Air valves come in different venting speeds:
- #4: Slowest venting (use near the boiler)
- #5: Medium-slow
- #6: Medium-fast
- C: Fast
- D: Faster (for large radiators)
Not sure which size? Go with a #6. It’s the most versatile.
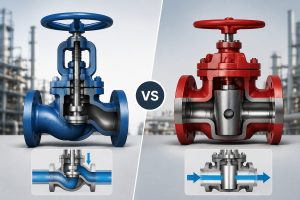
Adjustable vs. Fixed
Adjustable valves (like the Hoffman 1A) let you fine-tune the venting speed.
Fixed valves are simpler but less flexible.
My recommendation? Start with fixed valves. They’re easier for beginners.
How to Replace Air Valve on Steam Radiator Step-by-Step
Ready to do this?
Let’s walk through it step by step.
Step 1: Turn Off Your Heating System
This is non-negotiable.
Turn off your boiler at the main switch. Let the system cool for at least an hour.
(Trust me, steam burns are no joke.)
Step 2: Remove the Old Valve
Here’s where technique matters.
Grip the valve body with your wrench. Turn counter-clockwise when looking straight at the valve.
Important: Don’t twist too hard. Old radiators have delicate threads.
Stuck valve? Try these tricks:
- Apply penetrating oil and wait 15 minutes
- Use a sharp tool to cut through any paint seal
- Rock the valve gently back and forth
Step 3: Prep the New Valve
Wrap Teflon tape around the threads of your new valve.
Go clockwise. Use 3-4 wraps. Don’t overdo it.
(Skip this step if your valve has a built-in gasket.)
Step 4: Install the New Valve
Thread the new valve in by hand first. This prevents cross-threading.
Once hand-tight, use your wrench for a final quarter turn.
Critical point: The valve must be vertical with the vent hole on top.
Step 5: Test Your Work
Turn the heating system back on.
Open the radiator’s main valve (if it was closed).
Listen for that satisfying hiss as air escapes. Once the radiator heats up, the hissing should stop.
No heat? Double-check that your main valve is fully open.
Common Mistakes to Avoid
I’ve seen these errors countless times:
Overtightening: This cracks the radiator’s threads. Snug is enough.
Wrong orientation: Air valves must point straight up. Otherwise, they’ll leak.
Cheap valves: That $5 valve from the hardware store? It’ll fail in 6 months.
Ignoring main vents: Sometimes the problem isn’t your radiator valve. It’s your main vent in the basement.
Advanced Tips for Better Heating
Want to take your steam heating to the next level?
Try these pro strategies:
Balance Your System
Use different valve sizes to balance heat distribution:
- Smaller valves (#4, #5) for radiators near the boiler
- Larger valves (#6, C) for distant radiators
- Adjustable valves for problem rooms
Check Your Pressure
High pressure destroys air valves.
Install a 0-3 PSI gauge to monitor system pressure. Keep it under 2 PSI.
(Most residential systems run fine at 0.5-1.5 PSI.)
Consider Thermostatic Valves
These smart valves regulate temperature automatically.
They’re pricier ($50-100) but can cut heating costs by 10-30%.
When to Call a Pro
Look, I’m all for DIY.
But sometimes you need expert help:
- Multiple failed replacement attempts
- Damaged radiator threads
- System-wide heating problems
- Water hammer or loud banging
- Pressure issues you can’t solve
A good steam heating contractor charges $150-300 per radiator for professional replacement.
(Yeah, it’s expensive. That’s why learning DIY is worth it.)
Maintenance Tips to Extend Valve Life
Want your new valves to last?
Follow these maintenance tips:
Annual cleaning: Remove and soak valves in white vinegar for 20 minutes each fall.
Pressure monitoring: High pressure kills valves fast. Keep it low.
Water quality: Excessive boiler water makeup indicates leaks. Fix them.
Paint carefully: Never paint over air valves. They need to “breathe.”
Cost Breakdown and Savings
Let’s talk money.
DIY costs:
- Quality air valve: $15-25
- Teflon tape: $2
- Total per radiator: $17-27
Professional costs:
- Labor: $100-200 per radiator
- Parts markup: 50-100%
- Total per radiator: $150-300
For a house with 8 radiators, DIY saves you $1,000-2,000.
Not bad for 2 hours of work.
Troubleshooting After Replacement
Replaced your valve but still having issues?
Check these things:
Still hissing constantly?
- Valve may be installed upside down
- System pressure too high
- Wrong valve size
No heat at all?
- Main shut-off valve closed
- Air trapped in system
- Main vent needs replacement
Leaking water?
- Valve not tight enough
- Cross-threaded installation
- System overfilled with water
The Bottom Line
Learning how to replace air valve on steam radiator isn’t rocket science.
With the right valve and 30 minutes of time, you can fix most radiator problems yourself.
Start with one radiator. Get comfortable with the process. Then tackle the rest.
Your wallet (and your heating system) will thank you.
Remember: The key to success is choosing quality valves, taking your time, and not overtightening. Master these basics and you’ll handle steam radiator air valve replacement like a pro.