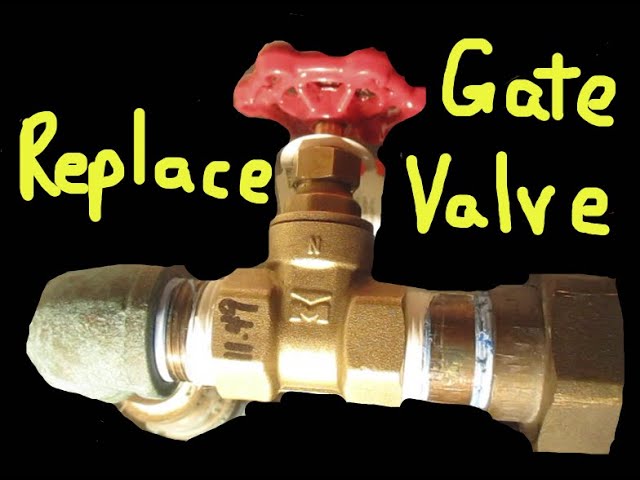
A gate valve is an essential component in plumbing and piping systems that controls water flow. Over time, gate valves can fail or become damaged and may need replacing. Replacing a gate valve is sometimes necessary to keep your plumbing functioning properly and prevent leaks or other issues.
In this comprehensive guide, I’ll walk you through the entire process of how to replace a gate valve, step-by-step. Whether you are a DIYer or a professional plumber, you’ll learn proper gate valve replacement techniques to get the job done correctly.

When to Replace a Gate Valve
There are a few signs that indicate it’s time to replace your worn out or faulty gate valve:
- The valve is leaking water from the stem, bonnet, or body
- The valve no longer fully opens or closes
- The valve handle spins freely without controlling water flow
- There is debris buildup inside the valve obstructing closure
- Significant corrosion and wear have occurred internally
Replacing a damaged gate valve will stop leaks, restore full flow control, and prevent potential pipe burst damage due to excess pressure.
How to Replace a Gate Valve Step-By-Step
Replacing a gate valve requires proper planning and preparation for smooth execution. Follow these key steps:
Step 1: Turn Off Water Supply Lines
Turn off the main water shut off valve for the house, building, or specific water supply line the gate valve is connected to. This eliminates water pressure so you can safely work on the valve replacement.
Relieve any remaining pressure by opening taps downstream of the gate valve. This allows trapped water to drain out.
Step 2: Disconnect and Remove Old Valve
Start by disconnecting any threaded fittings or flanges on either side of the valve. Having a bucket to catch residual water is handy.
Carefully remove the old, faulty gate valve from the pipe section. Take note of the valve’s size and connection type.
Step 3: Clean Ends of Pipe
Use emery cloth or a wire brush to thoroughly clean the outside of the attached pipe. Remove any excess old thread sealant, corrosion, or grime so the new valve can achieve a solid seal.
Step 4: Apply Sealant to Pipe Threads
Wrap plumber’s thread sealant tape in the direction of the threads around the clean pipe several times. This ensures the new valve forms a tight, leak-free seal.
Alternatively, or in addition to tape, apply pipe thread sealant paste around the threads.
Step 5: Install New Replacement Valve
Carefully screw in and hand tighten the matching threaded ends of the new gate valve onto each pipe end. Align it straight.
Finish tightening securely with adjustable pliers or a pipe wrench, being cautious not to over tighten.
Step 6: Restore Water Supply and Test
Slowly turn the main water supply back on. Carefully inspect your work, checking for leaks at connections or the valve stem. Tighten fittings if necessary.
Open and close the new gate valve several times, ensuring smooth operation throughout its rotation.
Step 7: Insulate and Label (Optional)
For added protection, wrap the valve and fittings with foam pipe insulation. This prevents heat loss and freezing.
Consider labeling the valve if in an obscure location. Write its purpose like “Main Shut Off”.
With the old gate valve successfully replaced, you can rest assured knowing your plumbing system has a properly functioning shut off point.
Common Problems When Replacing Gate Valves
While the gate valve replacement process itself is straightforward in most cases, a few things can complicate the repair:
- Rusted valve that resists removal even with penetrating oils or heating
- Pipe too short leaving insufficient room for the valve body length
- Damage to threaded pipe ends making new valve attachment difficult
- Difficulty locating main water shut off for the building
- Heavy corrosion or small leaks from pipes adjacent to old valve
Addressing any pipe corrosion and leaks in advance of replacement makes the job easier. Having the proper materials ready like pipe fittings, couplings, and extensions allows you to adapt to complications too. Alternatively, calling a professional plumber can be wise when significant issues arise.
Gate Valve Replacement Costs
Replacing a gate valve yourself costs between $55 to $250 depending on the specific style, type, and size you need. The average DIY gate valve replacement cost is $150.
Hiring a plumber raises replacement costs due to added labor fees of $45 to $150 per hour. Overall gate valve replacement costs from plumbers typically range from $175 and $450. Higher prices also come from emergency plumbing call outs.
Factors like the valve’s location, difficulty of access, overall project complexity influence final costs. Contact qualified plumbers to get accurate quotes for your situation.
Gate Valve Replacement Tools
Having the proper tools for gate valve replacement makes achieving a high-quality repair much simpler.
The essential tools needed include:
- Pipe wrenches (for grip and leverage)
- Adjustable wrench (fits various nut and bolt sizes)
- Emery cloth or wire brush (to clean pipe ends)
*Bucket (for catching water drainage) - Plumber’s tape (to seal threads)
- Torch set (helps loosen rusted parts)
While not definitive, this covers the typical tool requirements. Certain individual cases might need additional specialized tools too.
Conclusion
Replacing a faulty gate valve restores proper water flow control to your plumbing system. Follow the step-by-step gate valve replacement guide outlined here correctly for best results.
With the points covered, you now understand the entire process from disassembling the old valve to installing and testing a new replacement valve.
Address any existing pipe corrosion ahead of time for easiest valve removal. Obtain quality replacement parts matching your specific valve’s size and connection ends too.
Execute each step carefully and gate valve replacement can be completed by DIYers without issue. However, for complicated repairs, relying on a professional plumber may be safest.


